Oracle SQL Developer Data Modeler with Snowflake

Use Flexter to turn XML and JSON into Valuable Insights
- 100% Automation
- 0% Coding
Why Oracle SQL Data Modeler
Oracle Sql Developer Data Modeler (SDDM) is a free-to-use data modeling tool born to support developers while designing their database, or architecture, at a logical, relational or physical level, even storing and versioning changes in an easy and comprehensible way.
However, if you are a data engineer, then you might have already used it at least once. If not, just know that it may incredibly simplify your life.
Indeed, SSDM not only can help you to report, define and efficiently structure your DB metadata, but it also lets you create an ER diagram from an existing database (reverse engineer), or generate a DDL from a given ER diagram (forward engineer).
Since its release, Oracle Sql Developer Data Modeler has become extremely popular and has been worldwide adopted: in fact, compared to other famous tools it is completely graphical and, above all, can easily connect to many different DBs.
In this quick example we will go through it particularly focusing on Snowflake materialized views.
How to use SSDM working with Snowflake
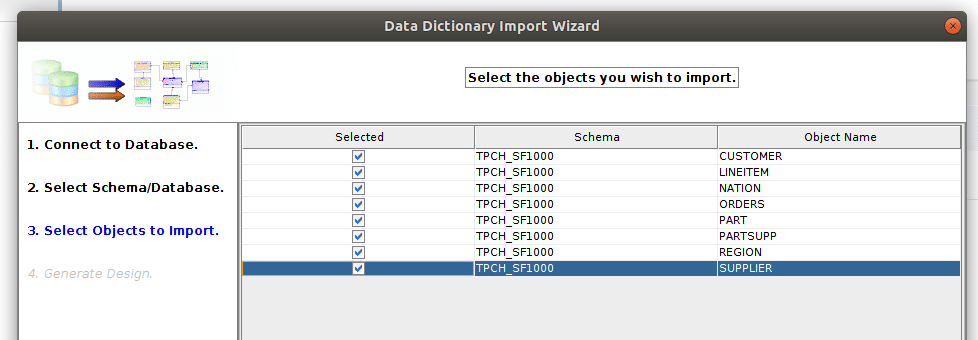
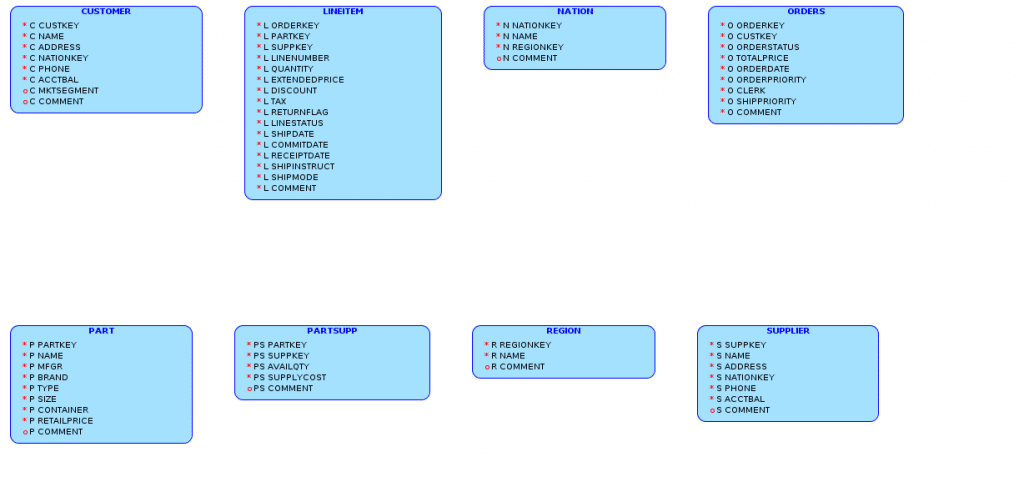
Before starting, we will import the TPCH_SF1000 schema from the Snowflake samples and we will try to reverse engineer it.
To do that, select File → Import → Data Dictionary from the menu and choose the jdbc connection to Snowflake (to learn how to connect see https://kentgraziano.com/2015/11/20/tech-tip-connect-to-snowflake-db-using-sqldevmodeler/).
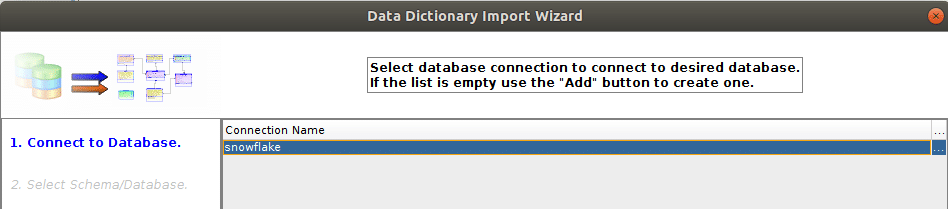
Then select the needed tables in the target schema of your “SNOWFLAKE_SAMPLE_DATA” DB just ticking the corresponding boxes.
That’s all.
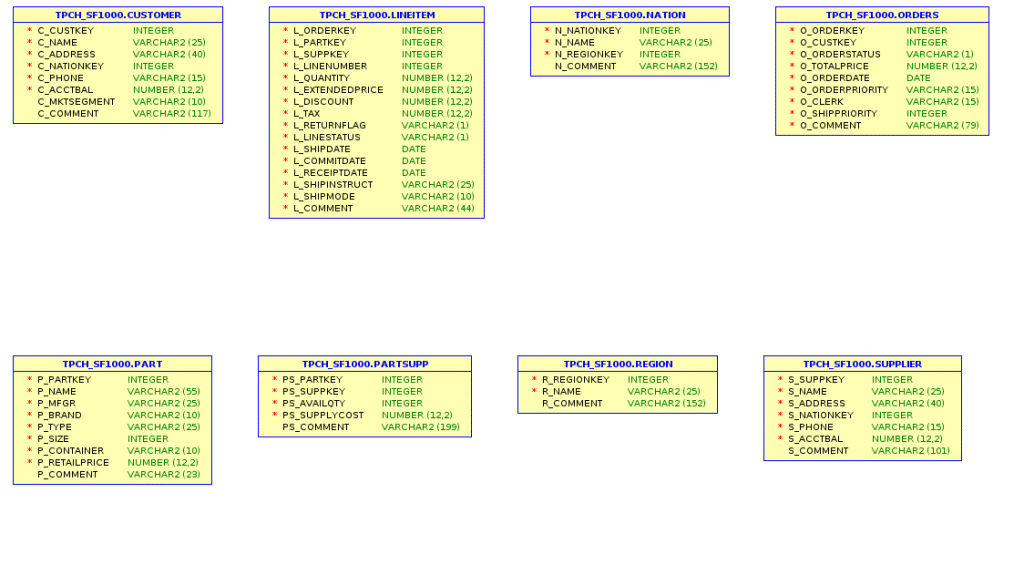
Unfortunately, it’s not always a piece of cake and this operation can frequently bring some inconsistencies. Let’s consider this sample table:

When working with such tables all these columns are actually generically imported as VARCHAR, which is definitely not what we wanted.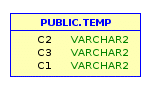
This because Oracle is not capable of automatically detecting Snowflake VARIANT, ARRAY or OBJECT data types without some extra work prior to the import.
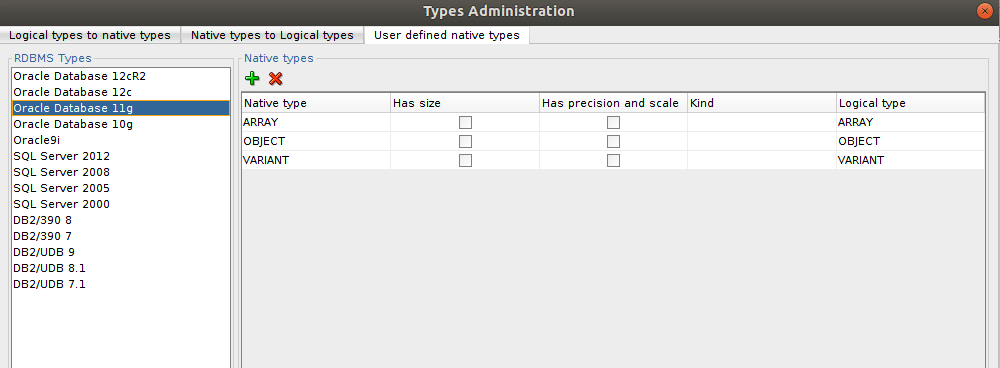
Luckily, in Snowflake official blog you may find a useful workaround (https://www.snowflake.com/blog/customizing-oracle-sddm-to-support-snowflake-variant/): in these circumstances, in the Tools → Types Administration → User defined native types tab we need to add three different entries (one for each data type) intitially set to the default unknown.
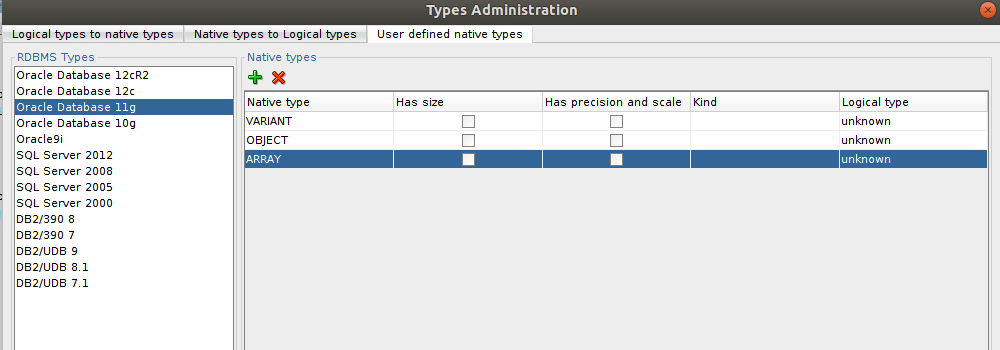
For each one, in the Logical types to native types tab we will choose a valid, meaningful, name and we’ll pick our newly added type from the dropdown menu alongside the database we are working with.
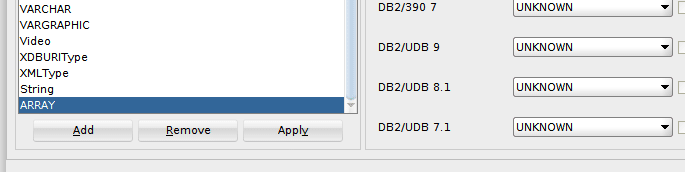
When done Apply and then Save.
Just remember to navigate back to the third tab in this same panel and click on the Logical type in order to select your new custom type from the dropdown menu.
To check if all that was not a useless effort, let’s try to import again our sample table.
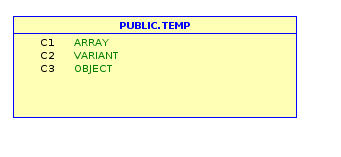
Cool, it really worked!
Note that there may be some issues also on the other side: in fact, as you know, Snowflake does not currently support BLOB, CLOB and user-defined data types. So pay attention when defining new attributes!
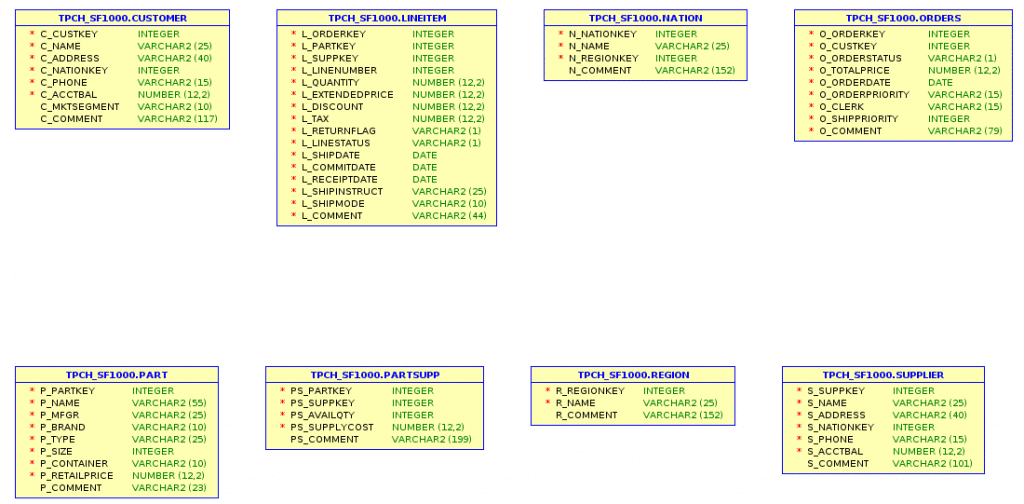
Ok, now we can get back to our TPCH_1000 relational model.
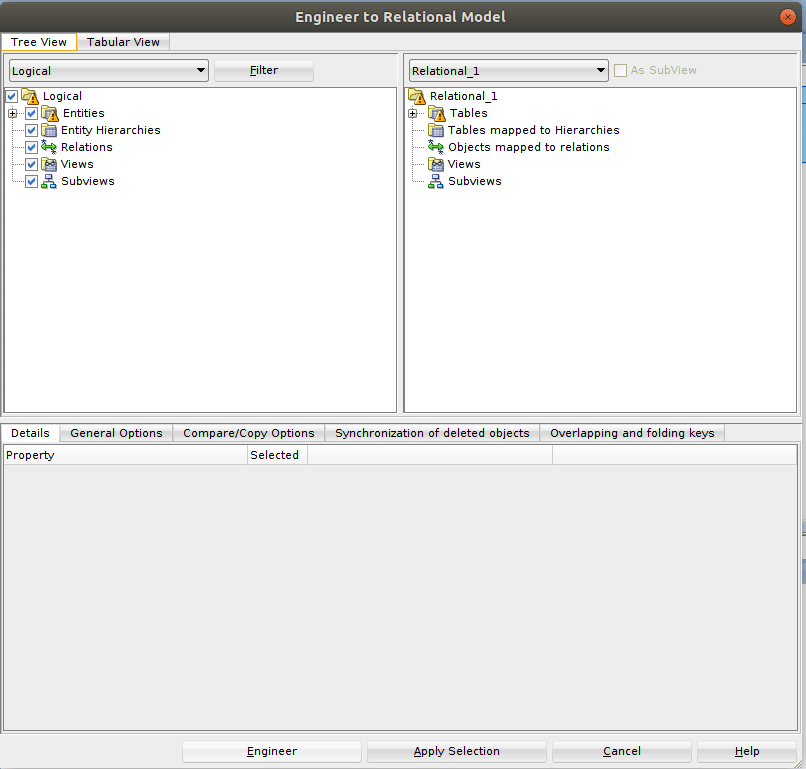
To generate the logical model click on << …

and then hit Engineer at the bottom.
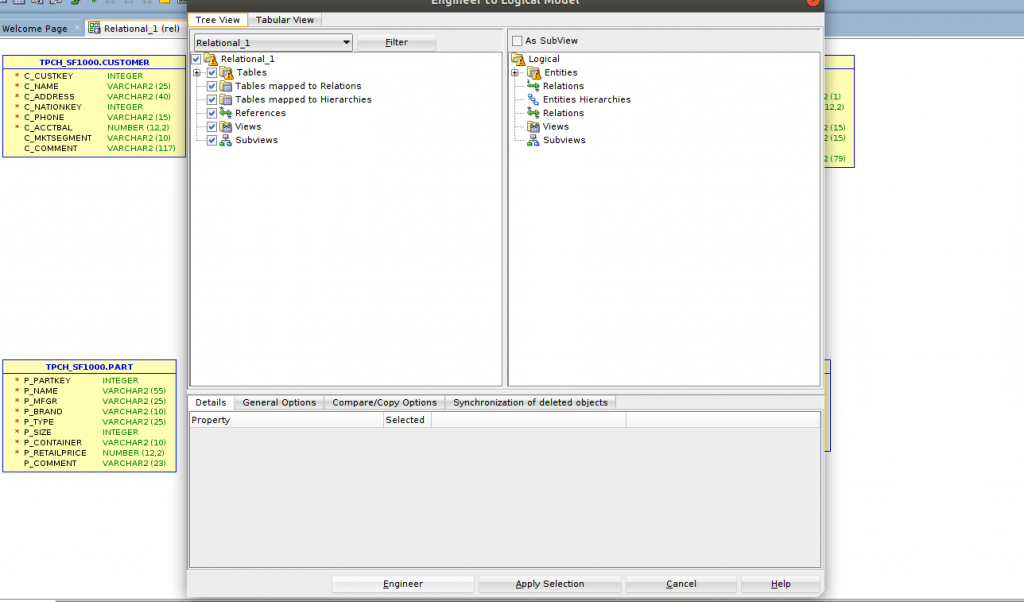
As you can notice, in very few simple steps you were able to successfully reverse engineer your schema.
We only need to perform some simple changes.
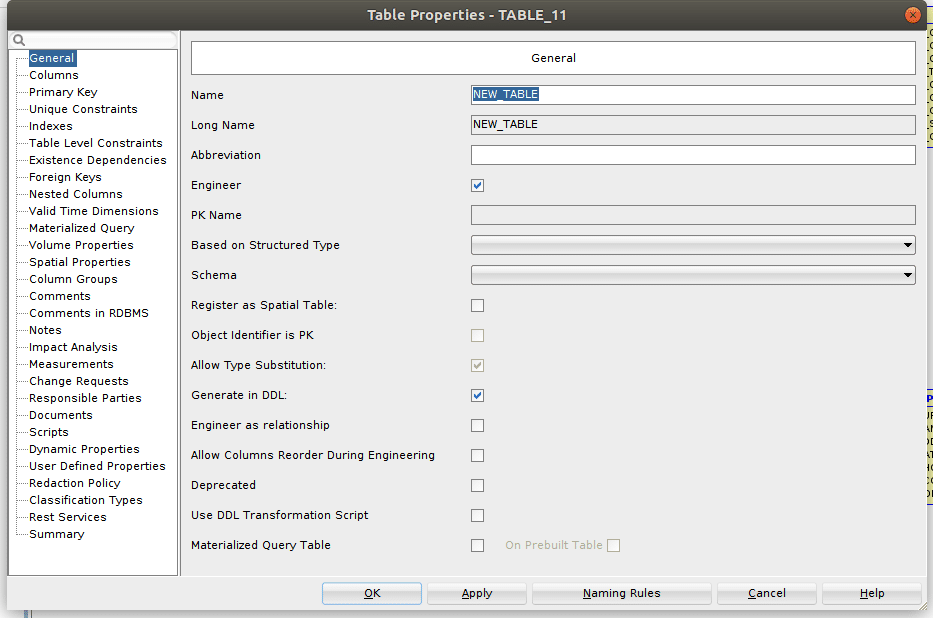
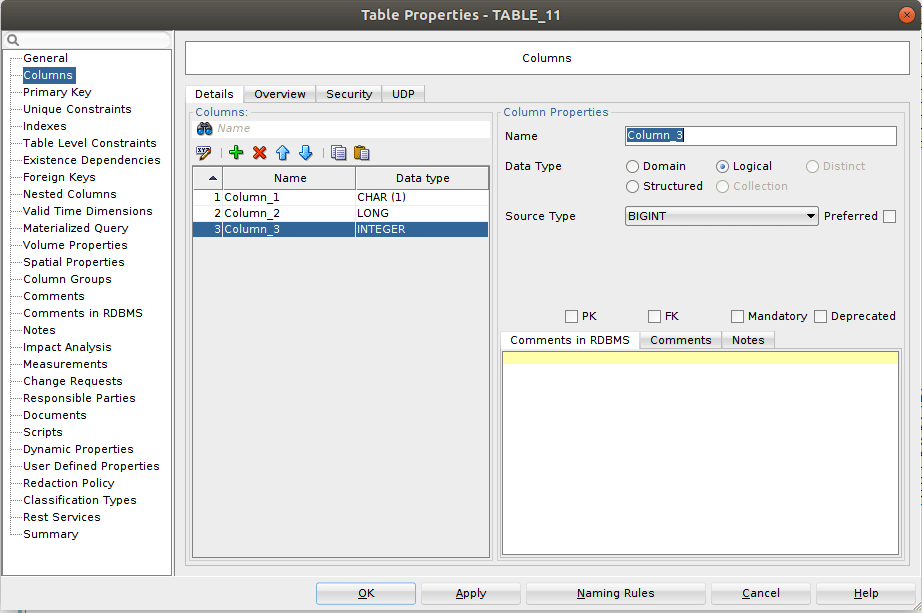
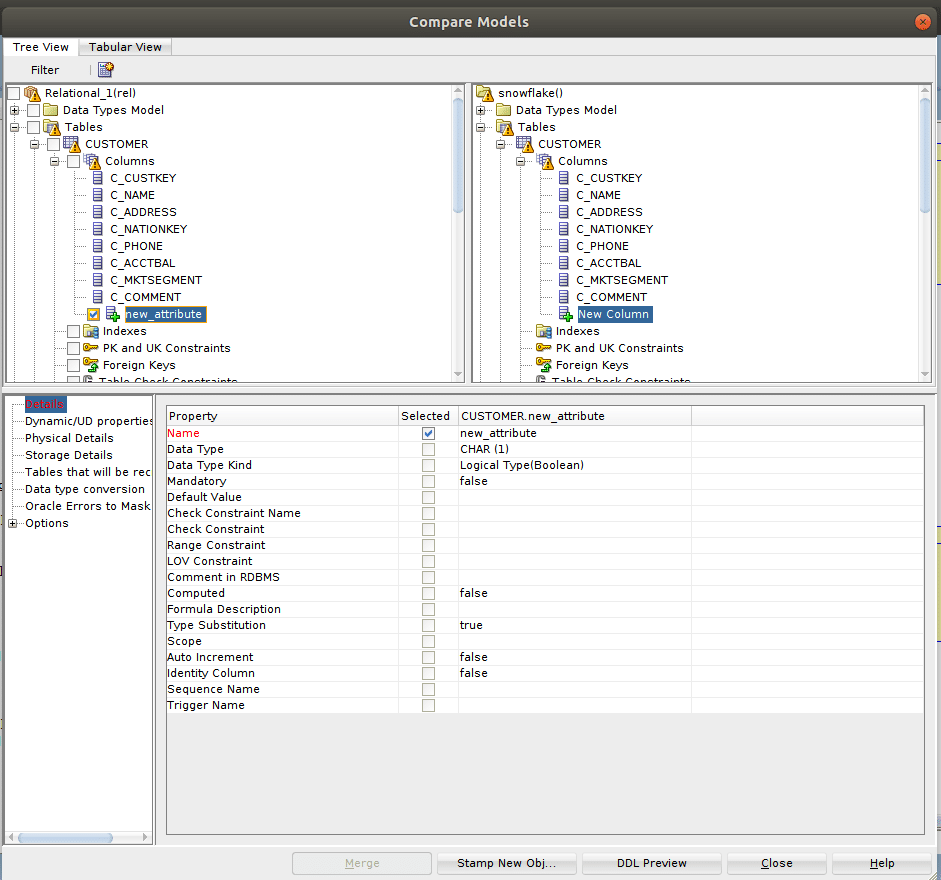
For instance, we can add a brand new table simply clicking on 
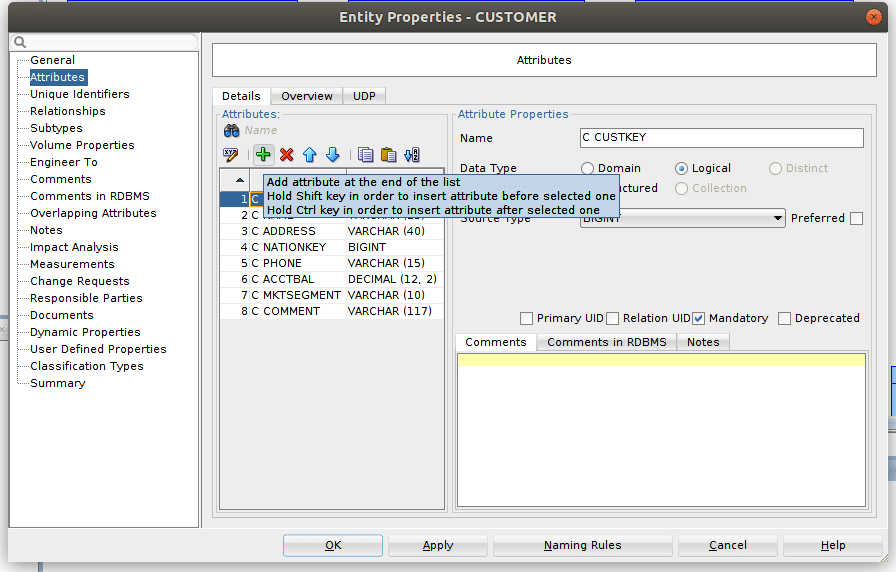
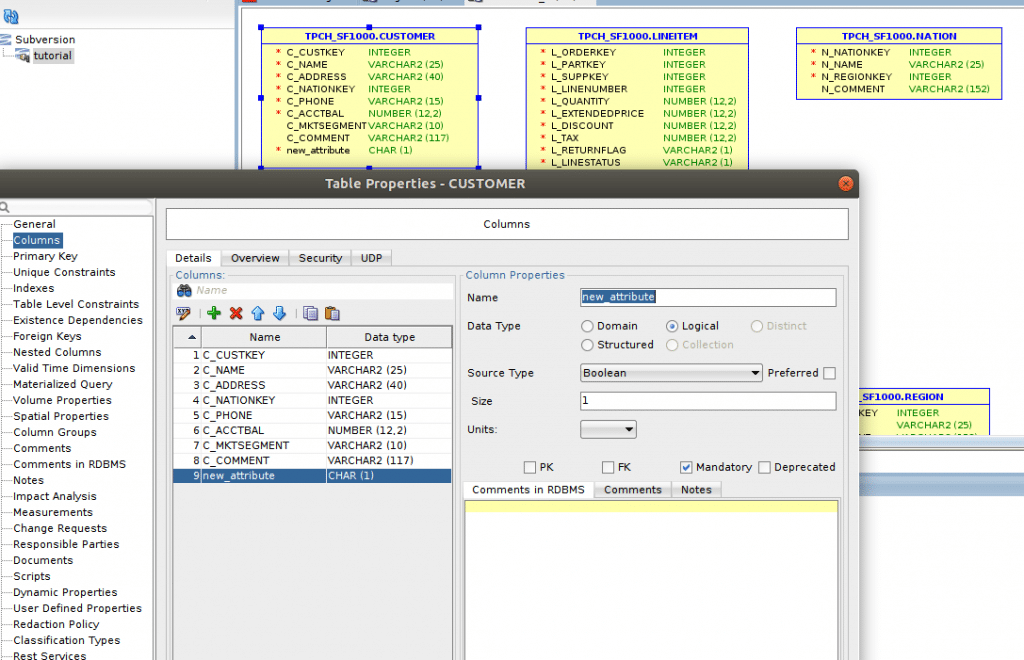
Otherwise we could switch to the logical model, double click on the CUSTOMER table and then press on the green + button in the Attributes section to add a new field (e.g. a Boolean ‘new_attribute’) .
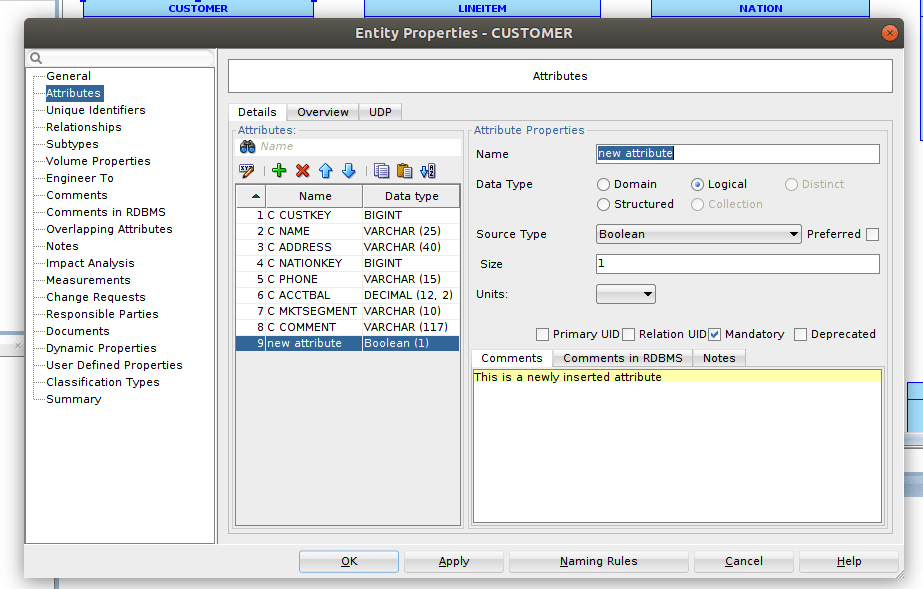
When you are through, press on >> in the toolbar in order to extend the updates to the relational model.
Obviously the list of possible actions is not limited to this but there is a myriad of other possible operations you can try.
Anyway, if at any point you are not satisfied with your changes, you might want to revert the model to its original state; in this case, all you need to do is re-synchronize the model against your remote Snowflake DB.
So, proceed as follows: in the toolbar you may find two blue arrows (← →)

When clicking on the left one, a window like this will pop up …
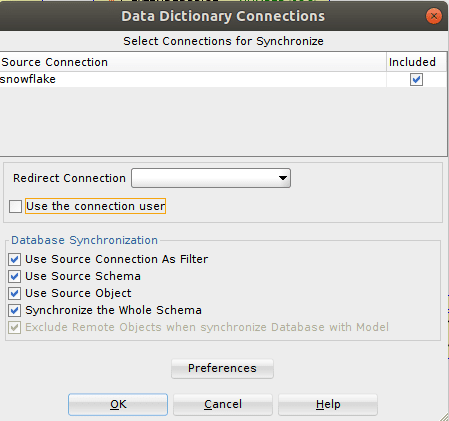
Select the existing connection to the Snowflake, press Ok and (if required) enter your Snowflake account password.
After that, you will see the SDDM immediately starting comparing the current model with the remote DB and, once finished, it will show a report signalling all the differing objects with a warning:
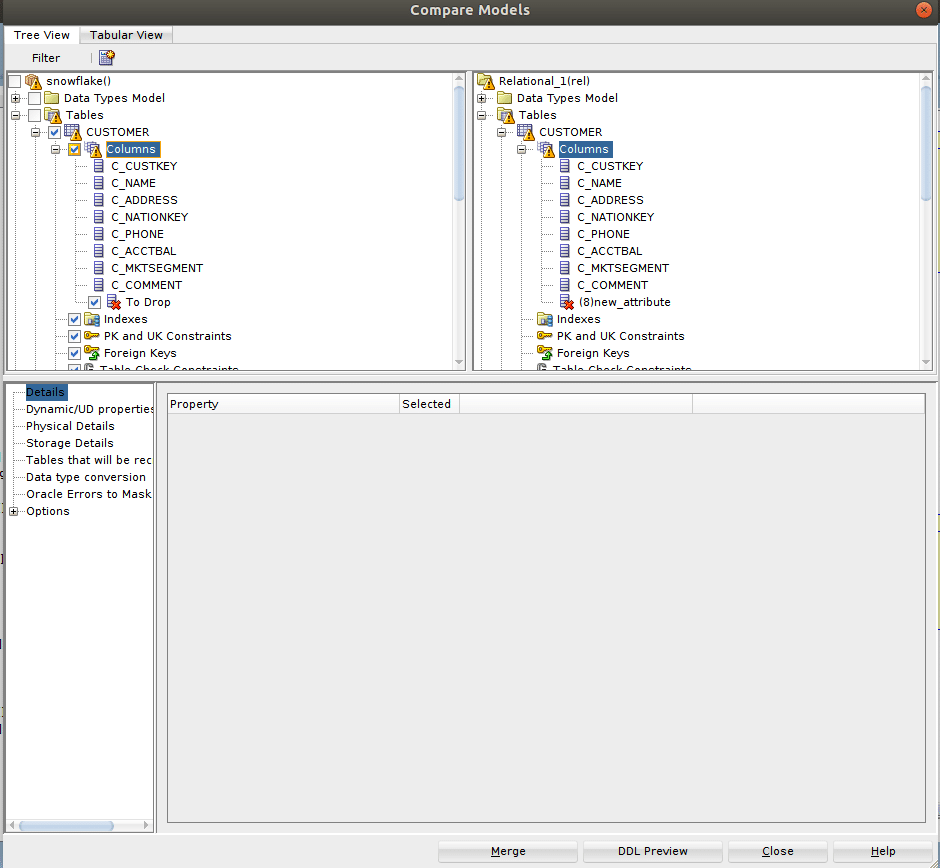
For example, above you may see our ‘new_attribute’ marked as missing in the target table.
After ticking the To Drop boxes and eventually clicking Merge, SDDM will automatically integrate the current model with the target one undoing our last changes.
Keep in mind that you should check only the boxes of those elements you really want to be affected.
Changes seem to have been correctly applied.
To double-check we can retry to synchronize our model and see if it does not pick up further differences.
This great feature (aka Compare/Merge Utility) can involve not only a live database but also other models.
On the contrary, if your purpose is to commit the updates in the source DB, then click on the right arrow (Synchronize data dictionary with model) and you will see, once again, a Compare Models window being displayed.
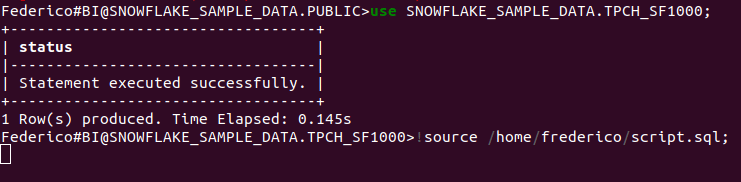
In this case the Merge button at the bottom will be disabled (it’s annoying but in some cases it can prevent unwanted catastrophic consequences), yet you will still be able to apply your local changes remotely: first get and save the incremental DDL and, once done, run that script manually.
For example, you might execute the !source command in your SnowSQL session:
Tip:
Put your data model into a repository and associate it to the SDDM’s Subversion to split the responsibilities over your DBA team, knowing exactly when, how and by whom it has been modified.
Enjoyed this post? Have a look at the other posts on our blog.
Contact us for Snowflake professional services.
We created the content in partnership with Snowflake.
Uli Bethke
Uli has been rocking the data world since 2001. As the Co-founder of Sonra, the data liberation company, he’s on a mission to set data free. Uli doesn’t just talk the talk—he writes the books, leads the communities, and takes the stage as a conference speaker.
Any questions or comments for Uli? Connect with him on LinkedIn.
Follow Uli Bethke: