Snowflake for real time streaming. Change Data Capture with Qlik Replicate

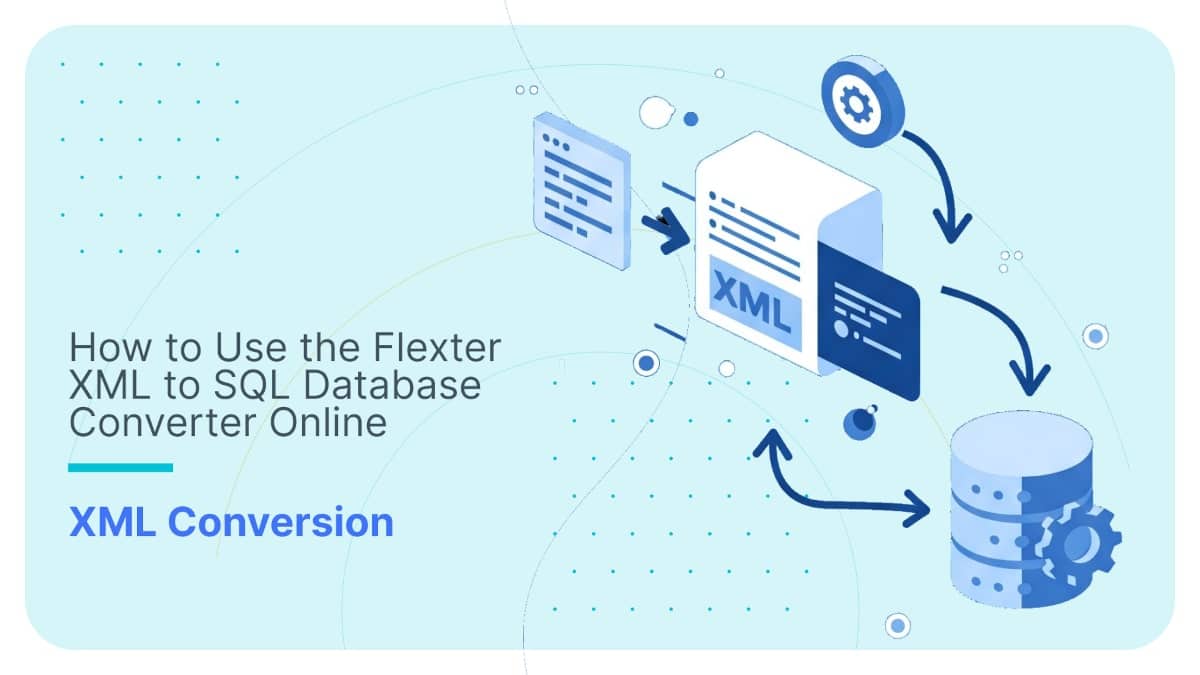
Use Flexter to turn XML and JSON into Valuable Insights
- 100% Automation
- 0% Coding
Overview
In this two part series on streaming with the Snowflake Data Platform, we use Snowflake for real time analytics.
In part one, we use Qlik Replicate to identify changes to source data and replicate the changes to Snowflake in real time including change data for an audit trail.
In part two, we show how you can use the change records in Snowflake for stateful and stateless streaming. We also show you what a Persistent Staging Area is and explain some core streaming concepts.
Qlik Replicate
Qlik Replicate is available in various editions. We will use the AWS Marketplace edition in this blog post. It is billed by the hour and is a perfect fit for Snowflake’s utility billing model. It does not come with support from Qlik (only a forum) though. You can reach out to us if you need consulting services on it.
You can use most relational databases with Qlik Replicate for Change Data Capture (CDC). CDC is used to identify new or changed data in a data source, e.g. the records that have been inserted, updated, or deleted. This information is then used to update the layers in the data warehouse, e.g. the Persistent Staging Area or the data integration layer etc.
There are various CDC techniques:
- Identify changes by timestamps in the source tables, e.g. a column that stores the inserted or modified timestamp of rows.
- You can also identify changes by comparing yesterday’s data with today’s data. This is very useful if you need to compare two data sets that involve complex business transformation logic, e.g. when loading a dimension table.
Both techniques will put extra load on the source systems. They will also miss any intraday changes to data between batches.
In this blog post we look at another technique: Mining the transaction log.
Tools such as Qlik Replicate connect to the transaction log of a database and collect information about modified data (INSERT, UPDATE, DELETE).
This has a minimal impact on the source database, can happen in real time, and also captures intraday changes to data. For most scenarios this is the preferred way of CDC.
Let’s set up our source and target databases first and then replicate the data.
Snowflake as a Target
Qlik Replicate supports many data stores as a target.
In this blog post we are interested in Snowflake as the target database.
General Connection Parameters
The configuration of Snowflake as an endpoint is easily done and can be changed at a later stage if required.
We prepare the endpoint by going through these steps:
- In the Qlik Replicate Console, click Manage Endpoint Connections to open the Manage Endpoints Connections dialog box.
- In the Manage Endpoint Connections dialog box, click New Endpoint Connection.
- In the Name field, specify a name for your Snowflake instance on AWS or Azure. We will use AWS.
- Optionally, in the Description field, enter a description for the Snowflake on AWS target endpoint.
- Select Target as the role.
- Select Snowflake on AWS.
- Configure the remaining settings in the General tab as described in the table below.
| Snowflake URL | Your URL for accessing Snowflake on AWS (or Azure). |
|---|---|
| User name | Your Snowflake user name. |
| Password | The password for the user entered in the User name field |
| Warehouse | The name of your Snowflake warehouse. |
| Database | The name of your Snowflake database. |
8. In the next section we specify where we want to stage our data. We can choose a Snowflake Stage or AWS S3 (Azure blob storage). The options allow you to choose where you want to stage the data files. If AWS S3 is chosen then further settings will have to be configured which will provide the details of the bucket like access type, bucket region etc. This will give Qlik Replicate the read/write access to the S3 bucket to work automatically. For our purpose we have chosen Snowflake (internal stage) as the staging location.

Advanced Connection Parameters
The user can also specify some advanced settings for the endpoint
- Max file size (MB) – Select or type the maximum size of the CSV file used to transfer data to Snowflake. The default value is 100 MB and we have used the same.
- ODBC driver – The name of the default ODBC driver you are using to connect to Snowflake. The default value is SnowflakeDSIIDriver.
- Additional ODBC connection properties
On completion of the details you can check the connection from your endpoint and it should be able to connect to Snowflake.
MySQL as a Source
MySQL confuguration
We first installed the MySQL ODBC 64-bit client version 5.2.6 on the Qlik Replicate server. If you have any problems setting it up you can use our professional services.
For CDC replication, we also need to enable Binary Logging . You can configure this in MySQL’s my.ini (Windows) or mysql.cnf (UNIX) file.
- server_id – Inside a replication topology every server has to have a unique ID. Each ID must be different than the one used by any replication master or slave. It can be any value from 1. Example: server_id=1
- log-bin=<path> – Path to the binary log file (without an extension). Example: log-bin=E:\MySQL_Logs\BinLog
- binlog_format – Must be: binlog_format=row
- expire_logs_days – To prevent disk space issues, it is strongly recommended not to use the default value (0). Example: expire_logs_days=5
- binlog_row_image – Must be: binlog_row_image=full
- binlog_checksum – NONE or CRC32. When enabled, this parameter causes the master to write a checksum for each event in the binary log. The default from MySQL 5.6.6 is CRC32. Before that, the default is NONE.
- log_slave_updates – When replicating from a MySQL slave database server. This value should be set to true (1). If set to 0 (the default) updates on a slave received from a master during replication are not logged to the slave’s binary log. The slave’s binary log needs to be enabled for this to have an effect.
You need to enable Binary Logging on the MySQL server side. Set the above parameters as per your requirements, e.g. data volume etc.
For our purpose we have used the basic features to enable the Binary Logging:
- server-id=1
- log-bin=bin.log
- log-bin-index=bin-log.index
- max_binlog_size=100M
- binlog_format=row
Qlik Replicate endpoint configuration
General Properties
To set up MySQL as a source we need to go through the General Connection Properties section of Qlik Replicate:
- In the Qlik Replicate Console, click Manage Endpoint Connections to open the Manage Endpoints Connections dialog box. Then click the New Endpoint Connection button.
- In the Name field, type a name for your endpoint.
- In the Description field, type a description that helps to identify the MySQL database. This is optional.
- Select SOURCE as the endpoint role.
- From the Type drop-down list, select MySQL.
- In the Server Name field, enter the hostname or IP address of the computer on which the MySQL database is installed.
- Type the MySQL authentication information (User Name, Password) for the authorized user for this MySQL database.
- Security – SSL Authentication Options
- SSL Mode – Keep it as None.
- Client certificate path – NA
- Private key path – NA
- CA Path – NA
Advanced Properties
You can specify the following options:
- Check binary log for new events every: Specify how often to check the binary log for changes when the endpoints are idle. Default value will be 5 seconds.
- Additional ODBC connection properties: Specify any additional ODBC connection parameters that may be required.
- Database timezone: Select the time zone where the source database is located.
While trying to create a source with ODBC 8.0 driver installed on Windows we got the following error message:
We solved it by using the older version of the ODBC driver: 5.3.13. We configured this version of the driver in the Advanced Connection Properties of the endpoint. Once we applied these changes the connection was established. The details of the advanced connection settings can be seen below.
Summary of the connection settings:
Replicating data
Sources and targets in Qlik Replicate
Qlik Replicate supports replication between multiple platforms and several data types for each platform. For the purpose of this post we are interested in Snowflake as the target. Some of the sources that are supported for Snowflake include:
- Amazon RDS for PostgreSQL
- Google CLoud SQL for MySQL
- IBM DB2 for LUW
- Microsoft Azure SQL Managed Instance
- MongoDB Database
- MySQL- Based Database
- ODBC with CDC
There are many more.
Replication direction
There are different types of replication direction
- Unidirectional – From one source to one target
- Bidirectional – From one source to a target and the reverse
- Log Stream Staging – From one source to multiple targets through a separate staging area for changed data.
Supported types of replication
Full Load
Choose Full Load for the initial load of your data from source to target.
It will automatically create files or tables at the target.
During the initial load you can continue to update and modify source tables. In flight changes will be replicated once the full load is complete.
The Full Load can be customized with various settings:
- Target table preparation:
- DROP and Create table: The table is dropped and a new table is created in its place.
- TRUNCATE before loading: Data is truncated without affecting the table metadata.
- Do nothing: Existing data and metadata of the target table will not be affected. New data will be added to the table.
- Create primary key or unique index after full load completes: Select this option if you want to delay primary key or unique index creation on the target until after full load completes.
- You can set the replication task to stop automatically after the Full Load completes.
Apply Changes
The Apply Changes option syncs any new data that is added after the initial load. You can combine it with a Full Load, e.g. first run the Full Load and once complete, run Apply Changes
You can also set the DDL policy when using Apply Changes:
- When source table is dropped, select one of the following:
- DROP target table
- Ignore DROP
- When source table is truncated, select one of the following:
- TRUNCATE target table
- Ignore TRUNCATE
- When source table is altered, select one of the following:
- ALTER target table
- Ignore ALTER
This is quite a powerful feature and you can evolve your schema over time.
Store Changes
With the previous two options you can sync data from source to target. However, If you want to preserve the history of changes as an audit log you should select Store Changes.
The Store Changes option can also be selected when creating the task or from the Store Changes sub tab under Changes Processing in the Task Settings. When switched ON the changes are stored in either Change Tables or an Audit Table. The option to store the changes can be further selected from the Store Changes in drop down list.
When using Store Changes you can specify the following options
- Add a table suffix to the change table, e.g. _ct
- Apply DDL changes from source to target, e.g. if a column is added
- Also store pre- update records
- Create a separate audit table
The options available above can be used individually and also in combination with each other. Hence all three options can be used together. We will check some of these combinations in the next step of this blog post.
Replication in practice
Full load and Apply changes
For this section we will look at the replication process in more detail. For our purpose we will be syncing MySQL and Snowflake:
- Source – MySQL
- Target – Snowflake on AWS
We will first create a table in MySQL and then look into replicating the same in Snowflake using Qlik Replicate. Let us look at the steps:
1. Create a table in MySQL.
Create table qlik_input.customer(customer_id integer, customer_name varchar(20));
2. Insert some data into the table to be used for replication.
|
1 2 3 4 |
insert into qlik_input.customer(customer_id, customer_name) values (1, "Ray Donovan"), ( 2, "Alison Becker"), (3, "Lisa Johnson"); |
3. Now the table can be used for replication. The first step is to create a new task in Qlik Replicate. We have selected the following options from the create task console:
a. Profile – Unidirectional
b. Load Options – Full Load and Apply Changes (Default settings).
In order to choose any of the two options from Apply changes and Store Changes we need to enable Binary Logging in the MySQL server.
Once this is done you can drag and drop the source and target into the task map.
4. The next step would be to select the source table from MySQL. In our case it will be the one we created at the beginning. We can see that Qlik Replicate can automatically identify all the schemas and the tables from the source.
5. In the task settings section we can set the target schema if we want to do the same. If it isn’t specified Qlik Replicate will take the source DB name as the default schema and create the same at the target and the table will be placed in the schema.
6. Now we can run the task and observe the changes live as the task is completed and keeps transferring all the data to the target schema.
7. Once the task is completed you can head over to the target (in our case – Snowflake) and check the table and the content to verify.
8. The next step would be to check how replicate can keep the two tables in the databases in sync. We will be making a few changes in the source table and observing the target database.
|
1 2 3 4 |
update qlik_input.customer set customer_name = "Tara Williams" where customer_id = 2; delete from qlik_input.customer where customer_id = 3; insert into qlik_input.customer(customer_id, customer_name) values (4, "Gordon Best"); |
Note: You can stop a replicate task and then resume at a later stage in case you don’t have a requirement to run the replication task 24*7. Apply Changes will catch up with the changes at the source once restarted.
Changes observed in Qlik Replicate console – The changes will be immediately reflected in the Change Processing tab of the task showing 1 insert, 1 update and 1 delete.
The same changes can be observed in Snowflake as well with real time sync:
As we will see in the next post we can use the Snowflake Changes clause to get the delta of changes over time.
Store changes
We will show how to implement the Store Changes option along with Full Load and Apply Changes. As mentioned before we can choose any combination of the available task options. Let us look at a few queries and the resulting changes in Snowflake with Store Changes.
Store Changes with Change Table:
- We shut down the task and activate the Store changes from the task options. In the “Change Table Creation” setting we have chosen – “Keep old changes and store new changes in existing Change Table”. For other options we have used the default value.
- Queries in MySQL
|
1 2 3 4 |
insert into qlik_input.customer(customer_id, customer_name) values (5, "Mike Tanning"); update qlik_input.customer set customer_name = "Luis Diaz" where customer_id = 5; |
3. Changes Observed in Snowflake : A changes table “customer_ct” has been created in the default schema. Once we select from the change table we can see the changes reflect in the same. The table provides a lot of information about the changes like the query type, timestamp of the change etc.
Store Changes with Audit Table:
- We stop the task and select the “Store Changes in” drop down to Audit Table in the task setting. In the “Change Table Creation” setting we have chosen – “Keep old changes and store new changes in existing Audit Table”. For other options we have used the default value.
- Queries in MySQL
|
1 2 3 4 5 |
insert into qlik_input.customer(customer_id, customer_name) values ( 6, "Perry Edwards"); update qlik_input.customer set customer_name = "Curtis Lewis" where customer_id = 6; delete from qlik_input.customer where customer_id = 6; |
3. Changes Observed in Snowflake : A table “attrep_audit_table” has been created in the default schema. We can change the schema if we want for the audit table in the settings. If we select the table we get to view the audit table:
Query:
|
1 |
select * from "QLIK_OUTPUT"."qlik_input"."attrep_audit_table"; |
Output:
As we can the audit table provides us with a lot of information about the changes. It records the Qlik Replicate task name, schema name, operation type, timestamp, record changed etc. The main difference between the change and audit table is that the audit table stores the data in JSON. We lose the data type and may also run into limitations around the maximum size of the column.
Conclusion
In this blog post we showed you how you can easily replicate data from source databases such as MySQL to Snowflake in real time with Qlik Replicate. You can also record any changes to your data and even apply DDL changes at the source for simple schema evolution.
In the next post we will show you how you can make use of the data for real time analytics on Snowflake, e.g. building a Persistent Staging Area or using it for stateful streaming. We will also explain some core streaming concepts such as stateless and stateful streaming and streaming windows.
It can be tricky to set up Qlik Replicate on AWS Marketplace. We can help you with it. Just reach out by mail or contact us.
This post was written in co-operation with Snowflake.
Enjoyed this post? Have a look at the other posts on our blog.
Contact us for Snowflake professional services.
We created the content in partnership with Snowflake.
Uli Bethke
Uli has been rocking the data world since 2001. As the Co-founder of Sonra, the data liberation company, he’s on a mission to set data free. Uli doesn’t just talk the talk—he writes the books, leads the communities, and takes the stage as a conference speaker.
Any questions or comments for Uli? Connect with him on LinkedIn.
Follow Uli Bethke: