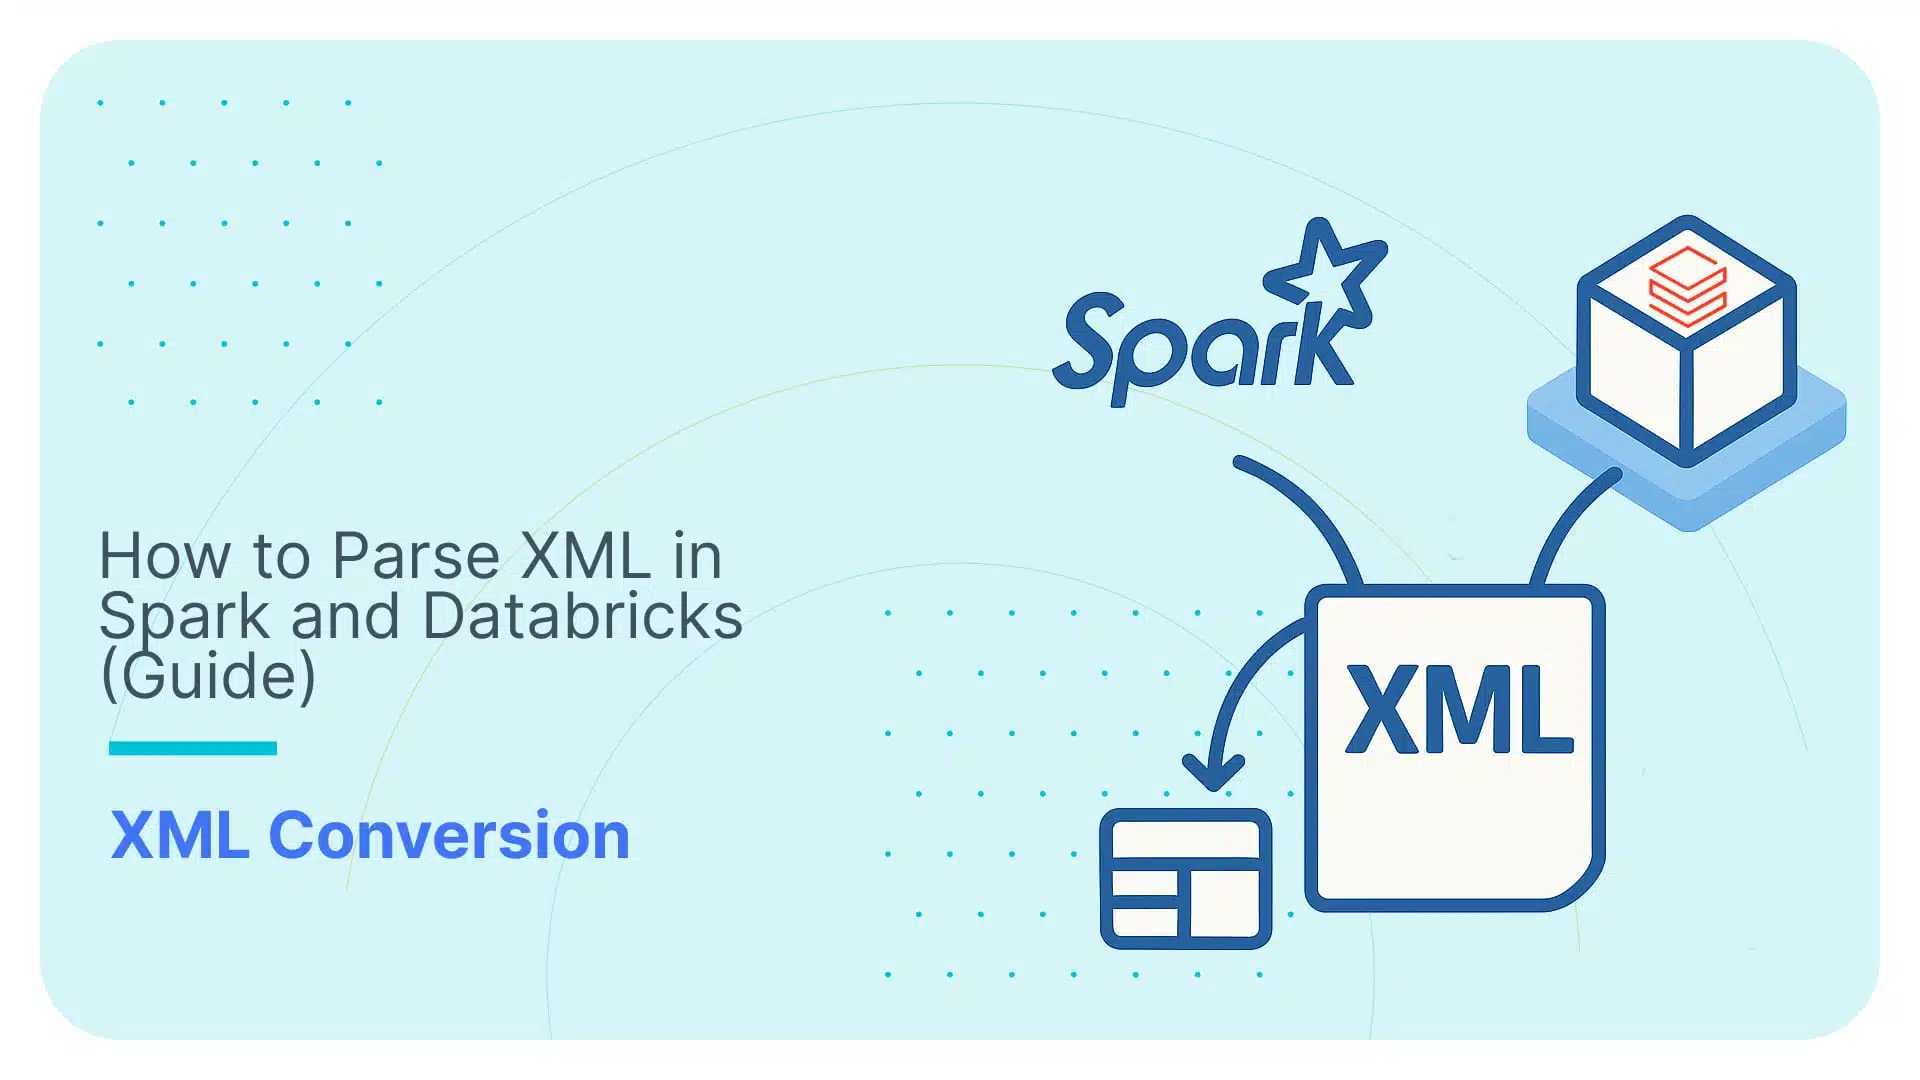
How to Parse XML in Spark and Databricks [2026 Guide]

You’d think working with XML in Spark 4.0 or Databricks 14.3+ in 2026 would be easy. But it often isn’t.
What works: Spark and Databricks can absolutely ingest XML and write it out to Delta tables, especially now with native XML support in newer runtimes.
For simple files and flat structures, you can get pretty far with built-in options and the spark-xml lineage of features.
The problems show up when you do this at scale: deeply nested structures, inconsistent files, and schema changes turn “a working demo” into a fragile pipeline that needs constant rewrites and babysitting.
If you’re dealing with production ingestion across evolving XML and XSD-heavy standards, Flexter is a no-code way to convert XML into Delta, without hand-maintained parsing logic.
TL;DR: This blog post breaks down how to convert XML into Delta Tables using Spark and Databricks, covering both spark-xml-based workflows and native support in Spark 4.0 and Databricks Runtime 14.3 (or higher).
Keep reading, and you’ll see:
- The fundamentals of converting XML to Spark and Databricks.
- The constraints of flattening XML with manual code approaches using spark-xml.
- Hands-on walkthroughs using both Spark and Databricks Notebooks.
- A summary of the limitations I encountered in my testing, which include errors in schema inference, XSD handling, and XML validation.
- Why Databricks’ Auto Loader feature isn’t the magic bullet it promises to be.
- How Flexter can free up your team by automating: schema discovery, documentation, outputs normalised tables (not One Big Table), and handling schema change without the constant rewrites.
Whether you’re exploring Spark and spark-xml features or setting up pipelines in Databricks, this guide will help you avoid common traps and build something that works beyond just one test case.
Quick decision guide
I know you’re busy; you know you’re busy; we both know you don’t have time to read my four workflows for converting your XML into Databricks.
Here’s a quick decision guide to get the most out of this blog post in no time:
-
- Use Spark and spark-xml when… you’re doing a small, controlled XML job, a one-off analysis, or a demo. Expect manual flattening, handheld schema work, and a growing pile of “quick fixes” once the XML gets nested, inconsistent, or evolves.
-
- Use native XML in Databricks when… you want the fastest “it runs” path inside a notebook for simple XML, and you’re okay with the fact that the hard part still lands on you: modelling, flattening, validating, and dealing with real-world variability.
-
- Use Auto Loader when… your main problem is incremental file ingestion (lots of files landing in cloud storage), and you want the plumbing handled. It’s still not a magic “XML to clean tables” button: you’ll be doing schema wrangling + flattening + evolution babysitting yourself.
-
- Use Flexter when… this is a production XML conversion project, not a science project. You want automation end-to-end, normalised relational tables (not OBT), schema evolution without constant rewrites, and metadata management so changes don’t silently wreck downstream consumers.
Use Flexter to turn XML and JSON into Valuable Insights
- 100% Automation
- 0% Coding
Converting XML to Spark and Databricks
This section is your quick jumpstart. I’ll walk you through the essentials and link you to other deep-dive posts where I get into the details of each specific sub-topic.
If you’re already comfortable with the basics, feel free to jump ahead to the section where I dig into XML handling features in Spark and Databricks: what’s new, what’s improved, and what still needs work.
Fundamentals of converting XML to Spark and Databricks
So, what is XML? And what’s the deal with XSD?
XML is one of those file formats that’s everywhere, especially when it comes to exchanging data between systems.
If you’re pulling data from government agencies, financial services, or healthcare systems, you’ve probably seen more XML than you’d like.
But here’s the thing: XML wasn’t built to store files efficiently, especially considering large data volumes. That’s why we usually convert it to something more query-friendly.
Now, when dealing with XML, you’ll often see XSD files alongside it. Think of an XSD as the instruction manual. It tells you what’s allowed in the XML file, what elements should be there, what types they are, how they relate to each other, and so on.
Many industry standards are built using XSDs, like HL7 in healthcare or ACORD in insurance. If you’re curious, I’ve put together a library of XML Data Standards elsewhere in this blog.
Pro tip
XSDs are supposed to be the easy button for XML. In “theory”, you hand over the schema, validate records, and let the platform do the rest.
In practice, this is where Spark and Databricks pipelines get painful: you still end up translating XSD rules into parsing + flattening logic by hand, and advanced XSD patterns (like polymorphism via xsi:type) can turn into edge-case roulette.
If you need this to work reliably in production, Flexter supports the full XSD spec (including polymorphism / xsi:type), auto-creates the relational target model, and removes the need to manually translate XSD constraints into your pipeline code.
What is Apache Spark?
If you’re not already using Apache Spark, you’ve probably heard the name thrown around in big data discussions.
It’s an open-source engine that can crunch massive datasets by distributing the work across a cluster of machines.
Whether you’re running batch jobs, real-time streaming, or even machine learning, Spark has tools for all of it.
I love how flexible it is; you can write SQL queries, use DataFrames, or drop into Python, Scala, or R depending on your comfort zone.
Before the release of Spark 4.0 (e.g. with Spark 3.5), you had to work with libraries like spark-xml, which would have been your right-hand man when dealing with XML in Spark and Databricks.
But now with Spark 4.0, you can directly work with native XML commands, which are based on spark-xml.
While this may seem like a cool new feature, as you’ll find out later on, spark-xml-based approaches come with some limitations, especially with complex or deeply nested XML structures.
And what about Databricks?
Databricks is where Spark gets seriously user-friendly. It’s a cloud-based platform built right on top of Spark, but with some interesting extras.
It gives you collaborative notebooks (think: Google Docs for data), easy scheduling, auto-scaling compute, and a bunch of handy integrations with AWS, Azure, and GCP. If Spark is the engine, Databricks is the smooth ride with heated seats.
The big difference? Databricks takes away many setup headaches, so you can just focus on your data.
Pro tip
An important part of using any tool is understanding its data lineage: how data moves, transforms, and ends up where it does.
If you’re getting started with Databricks, then it’s good to know that while Unity Catalog offers built-in lineage features like system tables, REST APIs, and visual diagrams, there are still some gaps.
For example, it doesn’t fully capture deeper multi-hop transformations or certain operations like UPDATE and DELETE.
These limitations can make troubleshooting and auditing more difficult in complex pipelines. For a closer look at what’s possible and where things fall short, check out this article.
What are Delta Tables (and Delta Lake)?
Suppose you’re working in Databricks (or planning to), then you’ll quickly come across Delta Tables.
These are tables built using Delta Lake, which is kind of like a smart layer on top of regular Parquet files.
Delta Lake adds:
- ACID transactions (yep, just like in SQL databases),
- Schema enforcement,
- Time travel (you can query past versions of your data),
- And a tidy metadata layer to keep things organised.
The key difference:
- Delta Lake is the technology/framework,
- Delta Table is the actual table format you use.
I love that Delta Lake is open-source, too; you don’t have to be on Databricks to use it (though it’s definitely easiest there).
So, what does it mean to convert XML to Databricks or Spark?
What we’re really talking about is converting your deeply nested XML files into formats these platforms are designed to handle, namely Delta Tables or Parquet files.
XML is inherently hierarchical: great for document storage and data exchange, but not ideal if you want to work with analytics.
Delta Tables and Parquet are tabular formats built for scalable querying, which you can use to convert your complex XML into flat, analytics-ready data optimised for large-scale processing.
You may choose to convert to either Parquet or Delta Tables; Delta is ideal for Databricks with features like ACID transactions and versioning, but since it’s built on top of Parquet, it’s heavier.
Parquet remains the more lightweight option and is widely supported across platforms like Spark, Hive, Snowflake, Redshift, AWS Athena, and more.
Still not sure whether Delta or Parquet is right for your XML conversion? I’ve put together a quick comparison to help you decide:
|
Feature(s) |
Delta Table |
Parquet |
|---|---|---|
|
ACID Transactions & Data Consistency |
Built-in support for ACID transactions: Better suited for concurrent writes and updates. |
No ACID support; requires external tooling or orchestration for data consistency. |
|
Schema evolution |
Supports schema enforcement and evolution out of the box. |
Limited schema evolution; needs manual updates and schema tracking. |
|
Versioning |
Allows querying previous versions of data (time-travel queries). |
No native support for versioning. |
|
Performance on Updates & Deletes |
Optimised for upserts, deletes, and merges. |
Not designed for row-level updates; best for immutable datasets. |
|
Integration with Databricks Ecosystem |
First-class support in Databricks with enhanced UI and tooling. |
Also supported, but lacks advanced features. |
|
Storage & Metadata Overhead |
Slightly higher due to transaction logs and metadata. |
Lightweight; no extra storage overhead. |
|
Interoperability with External Tools |
Requires Delta Lake support in other environments. |
Widely supported by Hadoop, Spark, Presto, Trino, and other open data tools. |
|
Complexity of Setup outside Databricks |
Requires Delta Lake installation and setup if not using Databricks. |
Works out of the box with most data tools. |
Why even bother converting XML to Spark or Databricks?
Honestly? Because working with raw XML at scale is a nightmare.
XML is bulky, nested, and just not built for fast analytics.
Spark and Databricks, on the other hand, are made for scale. They can tear through massive datasets, once the data is in a format it understands.
So what do we do? We convert the XML into Parquet or Delta Tables, which:
- Speed up queries,
- Compress better (so you save on storage),
- Are way easier to use in modern ETL and analytics pipelines.
Pro tip
When you’re just starting out with Databricks, one of the most important things you can do is learn what your SQL is doing behind the scenes.
Understanding how queries interact with your data, what’s being read, written, or transformed, lays the groundwork for better debugging, auditing, and optimisation.
Tools like FlowHigh can help by parsing SQL and giving you clearer insights into query behaviour. It’s not just about using a tool: it’s about building that deeper awareness early on.
This article breaks it down really well: SQL parser for Databricks – Parsing SQL for table audit logging and much more.
In short, here’s what you should remember from this section: Whether you plan to use Parquet or Delta Tables, in Databricks or Spark, converting your XML is essential for performance, scalability, and compatibility with modern data processing workflows.
XML isn’t exactly efficient for big data tasks, so transforming it into columnar formats like Parquet or Delta helps you take full advantage of Spark’s optimisation features.
It’s the difference between a messy, manual pipeline and a scalable, cost-efficient solution. Your project and your future self will thank you.
And regarding the Delta Tables vs Parquet debate, keep in mind that you should:
- Use Delta when you need transactional integrity, versioning, and schema enforcement: ideal for long-term, production-ready pipelines.
- Use Parquet when you need broad compatibility and want to skip the metadata overhead that comes with Delta.
Spark and Databricks’ XML conversion features and capabilities
If you’ve ever wondered how Apache Spark, Databricks, and spark-xml fit into the picture and what their features are, you’re in the right place.
Since Databricks was built by the original creators of Apache Spark, it’s no surprise that their XML conversion features share the same DNA.
This means that you’ll enjoy more or less the same core features, whether you’re working with Spark 3.5 and spark-xml, or the new native XML support in Databricks Runtime 14.3 and Spark 4.0.
Let’s Dig Into the Nuts and Bolts: Spark and Databricks XML Features
The reality? While Spark and Databricks do give you control over how you read, structure, and write your XML data, that control comes at a cost.
This means you’ll get a decent set of commands and configuration options—but they’re not always intuitive, especially when dealing with complex or inconsistent XML.
And here’s the downside: you’ll likely need to get fairly hands-on, tweaking settings, adjusting parameters, and writing manual code just to get your data into a usable format.
Here’s a detailed breakdown; first up, you get a few options in how you parse your XML:
- rowTag lets you tell Spark which XML element should act like a “row” when creating your DataFrame. Super handy if your XML isn’t naturally flat.
- Then there’s attributePrefix, which lets you tag attribute names with a prefix (like _attr_) so you don’t confuse them with child elements when parsing. If you’ve ever dealt with messy XML naming collisions, you know this feature is important.
- rootTag lets you define what the top-level XML tag should be when you’re writing XML out.
- valueTag gives you a clean way to capture the inner text of elements (not just their attributes), so you don’t lose valuable data when parsing.
- ignoreNamespace lets you ignore messy XML namespaces altogether if they’re just getting in your way, making queries simpler.
And there are a few more options for when you’re working with XSD (and trust me, you probably are if you’re dealing with industry XML standards):
- Despite this option not being trustworthy when processing large volumes of XML, you can infer schema from your XML without needing an XSD for your XML, using .option(“inferSchema”, “true”) when parsing your XML.
- And if you’ve got huge XML files to deal with, you can tweak samplingRatio to speed up the schema inference process without losing too much accuracy.
- If you have an XSD handy, you can validate your XML records as they’re read, catching bad or malformed data early instead of dealing with headaches later. For that, you may use the rowValidationXSDPath option.
- Plus, with the mode option, you can control whether Spark should drop, fail fast, or gently tolerate invalid records.
- And if you want to skip building a DataFrame schema manually (because who doesn’t?), you can use XSDtoSchema to convert your XSD into a Spark SQL schema automatically.
Don’t forget: Even though Spark 3.5, Spark 4.0, and Databricks Runtime 14.3 all promise XML support, there are some differences under the hood.
If you’re working with an older Spark version, like Spark 3.5, your initial configuration doesn’t support XML out of the box.
You’re forced to rely on an external library like spark-xml, which means managing JAR files and dealing with compatibility issues.
Only with Spark 4.0 and Databricks Runtime 14.3 does XML finally get built-in support, something that arguably should have been standard long ago.
And if you’re using Databricks, starting from Runtime 14.3, you can load XML files using Autoloader; although “no manual parsing” sounds great on paper, there are still a few details you’ll want to watch out for.
Spoiler alert: As I show later on in this blog post, I couldn’t get Autoloader to automate my workflow.
And while spark-xml has been a trusty sidekick for years, its future maintenance is starting to wind down, so if you’re thinking long-term, it’s smart to plan ahead.
If you’re looking to future-proof your workflows, using native XML in Spark 4.0 or Databricks 14.3+ is the clearest, safest path forward.
Pro Tip
Even if you’ve mastered every feature I just walked you through, don’t make the mistake of thinking Spark or Databricks can magically handle any XML or XSD file you toss their way.
Deeply nested XML can break your workflow, XSD support doesn’t fully capture schema constraints, and what about multi-file XSDs?
Later on in this blog post, I review all these errors that came up in my testing (and more).
Let’s just say things get messy. If you’re already itching for a shortcut, feel free to skip ahead; I’ll be showing you an automated solution that handles all of this without a single line of code.
How to convert XML to Delta Table with Spark 3.5 and spark-xml?
Alright, enough with theory and introductions; it’s time to get real.
In this section, I’ll show you the steps to get your source XML into a Delta Table in Spark.
Before I start, I assume you have already installed Spark and downloaded the JAR files for spark-xml and Delta Lake (if not, you may check this article).
For this workflow, I’ve used Spark 3.5.5 (with Java 8), as well as version 0.14.0 for spark-xml in combination with Delta Lake 2.1.0.
Oh, and do you want to follow along with my example? Grab my simple XML test case; it’s the perfect starting point to see how this process works.
It’s one of my go-to test files from a broader set I use to test various tools.
Ready? Let’s go!
This approach is fine for simple XML and demos, but if you need repeatable conversion across changing XMLs, jump to the automated option (Flexter).
Step 1: Set Up Your Python Environment and Install PySpark
Assuming you’ve already got Spark configured (because we’re past that, right?), now we’re diving into setting up your development environment.
To keep things simple, I’m using Visual Studio Code, since it enables you to create the Python environment easily through their UI and manage dependencies.
Once that’s set up, don’t forget to install PySpark (yes, another dependency) within your new environment.
Step 2: Configure your Spark session with the necessary libraries
To get our Spark session ready, you’ll need to build it and provide links to the JAR files for spark-xml and delta-core.
So, if the JAR files are in place, you should be able to set up your Spark session using the following code:
|
1 2 3 4 5 6 7 8 9 10 11 12 |
from pyspark.sql import SparkSession # Path to the JAR files spark_jar_path = "file:///C:/spark/spark-3.5.5-bin-hadoop3/jars" # Start Spark session with `spark-xml` and `delta-core` JARs, and Delta extensions enabled spark = SparkSession.builder \ .appName("XML to Delta Table Conversion") \ .config("spark.jars", f"{spark_jar_path}/spark-xml_2.12-0.14.0.jar,{spark_jar_path}/delta-core_2.12-2.1.0.jar") \ .config("spark.sql.extensions", "io.delta.sql.DeltaSparkSessionExtension") \ .config("spark.sql.catalog.spark_catalog", "org.apache.spark.sql.delta.catalog.DeltaCatalog") \ .getOrCreate() |
And please note that the Python variable spark_jar_path should point to the location where you installed Spark on your local machine and the respective jars subfolder.
Step 3: Read the XML file with spark-xml
Next up, it’s time to bring that messy XML file into Spark.
With the spark-xml library, you can tell Spark to interpret the XML schema and flatten it into a DataFrame.
But we need to tell Spark what the root element is (which one should act as the “row” in the DataFrame).
Please note that I’ve placed the simple XML test case in the root folder of my project (at the same level as my script).
Here’s how the Python code for this step looks:
|
1 2 3 4 5 6 7 |
# Path to the XML file xml_file_path = "simplexmltocsv_1.xml" # Read XML data into a DataFrame using spark-xml df_company = spark.read.format("xml") \ .option("rowTag", "Company") \ .load(xml_file_path) |
At this point, your df_company DataFrame contains a flattened version of your XML, so you’re almost ready to write it to a Delta Table, right?
Not quite. The spark-xml library handles the initial flattening by reading the XML and converting it into a DataFrame based on the row tag.
But if your XML is more complex and has multiple levels of nesting (which, let’s be honest, it probably does), you’ll need to handle the rest of the flattening manually.
And for that, you’ll need to roll up your sleeves and dive into Step 4.
Step 4: Manually flatten the XML throughout its hierarchy
Sorry to say: Here’s where you start to feel the manual pain, because you’ll have to unpack the XML layers one by one, like peeling an onion.
For that, we’ll use PySpark’s explode() command. Here’s how the code looks for the first explode statement:
|
1 2 3 4 5 6 7 8 |
from pyspark.sql.functions import col, explode # Explode statement 1: Exploding the Department > Team df_departments = df_company.select( col("_name").alias("company_name"), # Access the company name col("Department._name").alias("department_name"), # Access the department name explode("Department.Team").alias("team") # Exploding the Team array inside Department ) |
And then you’ll need to keep exploding..
It’s like a Russian doll of XML data, and you’re stuck opening every little one by hand. Don’t worry, you’ll be almost done when you hit the last layer.
Here’s how the rest of the code looks for this step:
|
1 2 3 4 5 6 7 8 9 10 11 12 13 14 15 16 17 18 19 20 21 22 23 24 25 26 27 28 29 30 31 32 33 34 35 36 |
# Explode statement 2: Exploding the Team > Project df_teams = df_departments.select( "company_name", "department_name", col("team._name").alias("team_name"), # Access team name after explosion explode("team.Project").alias("project") # Exploding the Project array inside Team ) # Explode statement 3: Exploding the Project > Task df_projects = df_teams.select( "company_name", "department_name", "team_name", col("project._name").alias("project_name"), # Access the project name after explosion explode("project.Task").alias("task") # Exploding the Task array inside Project ) # Explode statement 4: Exploding the Task > Subtask df_tasks = df_projects.select( "company_name", "department_name", "team_name", "project_name", col("task._name").alias("task_name"), # Access the task name explode("task.Subtask").alias("subtask") # Exploding the Subtask array inside Task ) # Explode statement 5: Final selection of required fields from Subtask df_final = df_tasks.select( "company_name", "department_name", "team_name", "project_name", "task_name", col("subtask._name").alias("subtask_name") # Access the subtask name ) |
And just like that, your data’s in place. But after all this manual work, is it still how you want it?
If you’re working with a real-world project, most likely no. Because you will still have to account for key challenges regarding flattened data.
Here’s the kicker: schema evolution is a known weak spot in Spark. So, if your XML structure changes (and it will), you’ll be back at the keyboard tweaking your code.
Pro tip
Yes, there are other approaches to flattening your XML, like using selectExpr() or withColumn().
But let’s be real: in the end, you’re still left with a flattened table.
The spark-xml library can help you parse and flatten, but it doesn’t go the extra mile to normalise your XML into an efficient relational schema.
You’ll end up with a “one big table” (OBT) that’s only usable for simple scenarios. Once you go beyond 3 levels of nesting it tends to become unusable.
For better scalability and efficiency, you’ll need to explore other strategies for schema normalisation.
Or you may skip ahead to where I give you the answer to XML to Delta Table.
Step 5: Save the flattened table to Delta
This is the part where your DataFrame finally gets saved as a Delta Table.
You’ve made it through the forest of explode(), and now it’s time to store your work in a nice, organised Delta Table.
Here’s the code for that (since we’re just testing, I saved it as a temporary view):
|
1 2 |
# Step 5.1 Register the DataFrame as a temporary view in the Spark catalog df_final.createOrReplaceTempView("df_final_view") |
And then you should be able to query and see your data:
|
1 2 3 4 5 6 7 8 9 10 11 12 13 14 15 16 17 18 |
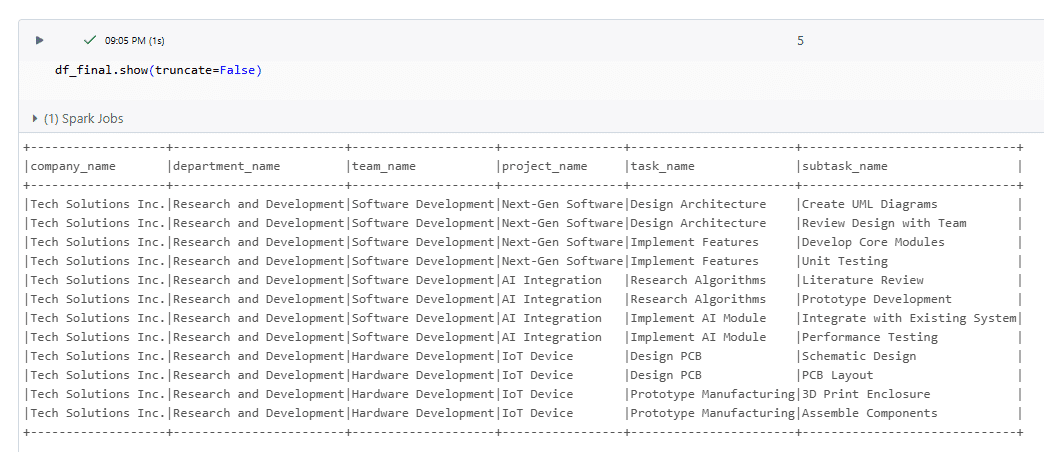
# Step 5.2: Run a SQL query on the registered view sql_query = """ SELECT company_name, department_name, team_name, project_name, task_name, subtask_name FROM df_final_view WHERE department_name = 'Research and Development' """ # Step 5.3: Execute the query using Spark SQL result = spark.sql(sql_query) # Step 5.4: Show the result of the query result.show(truncate=False) |
If all goes well, the result that you should get should be:

There you have it: your XML is now converted into a Delta Table.
But hold up before you start celebrating. Let’s be honest: this process is far from automated.
You’ve probably done your fair share of explode() gymnastics, and if the XML structure changes even a little, guess what? You’re back to tweaking code.
Spark-xml and Spark 3.5 aren’t exactly the “set it and forget it” solution we all wish for.
So, what happens when you switch to Databricks (14.3 or later)? Keep reading to learn more in the next section!
Pro tip
Next up, I’ll walk you through how to convert XML to Delta table using Databricks.
With the recent full release of Spark 4.0, it’s worth noting that spark-xml is now integrated directly into Spark.
So, while the following workflow focuses specifically on using Databricks, my local testing suggests that converting XML to Delta with Spark 4.0 (outside of Databricks) follows similar steps.
How to convert XML to Delta in Databricks
Parsing XML in modern data platforms should be easy. After all, we’ve had semi-structured data for decades.
But as I’ll show in this section, if you’ve ever tried working with XML in Databricks, even with version 14.3 that includes native XML support, you’ll quickly realise that “modern” doesn’t mean “convenient.”
Next, I’ll walk through the exact steps I followed to convert a simple XML file into a Delta Table using Databricks Community Edition.
Step 1: Register for Databricks Community Edition
You may start by Googling “Databricks Community Edition” and clicking through to https://community.cloud.databricks.com.
Instead of inserting your email in this first widget and clicking “Continue with email”, you should click Sign-up.

Once on the next screen, follow the typical routine of entering your email, verifying through a code you will receive in your inbox, and logging in.

Eventually, you’ll land on the Databricks dashboard, which should look like this.

Step 2: Set Up a Cluster
Next, we need to set up a compute cluster as the foundation where our XML conversions will run.
From the Databricks dashboard, you may click “New” as shown in the screenshot below:

And from the menu that pops up in the upper left corner, you may select “Cluster”:

In the new webpage that pops up, you’ll be asked to name your cluster and select a runtime version.
The most important part is selecting Databricks runtime version 14.3 or higher, so that you get the native XML support. Hit “Create compute”.

Now wait. Databricks takes a few minutes to spin up the cluster.
While Databricks takes its sweet time spinning up your cluster (yes, it can take 3 to 5 minutes), why not make good use of the wait?
I’ve put together a separate post on 9 essential tools every developer working with XML should know about.
This resource is definitely worth a skim before diving deeper into XML parsing.
To check whether your compute cluster has completed its setup, you may go to the main dashboard and, from the left side panel, click “Compute”, where you’ll find a list of clusters.
It should look like this:

Step 3: Upload the XML File
In the next step, let’s try to upload a simple XML test case to the cluster you just created.
Back at the dashboard, click “New” again and select “Add or upload data”.

You’ll be redirected to a new page where you’ll get a drag-and-drop interface for uploading your file. I highlight it with a red box in the next screenshot.

Once your XML file is uploaded, Databricks assigns a filepath within its internal filesystem (DBFS). For example:

You should look for the green tick sign and the file’s location, which is displayed next to it.
The rest of the options (i.e. “Create Table with UI” and “Create Table in Notebook”) should be ignored for now.
In this case, the file’s location is “/FileStore/tables/simpleXMLtocsv_2_-6.xml”. Keep a note of the location as we’ll use it to read the file from our Python script in the next few steps.
Step 4: Create a Notebook
A few more preparatory steps are needed before writing your XML to Databricks.
In Step 4, you need to create a Notebook, which you’ll use to write your Python scripts.
Click “New” and then “Notebook” and give it a name. Attach it to your running cluster.

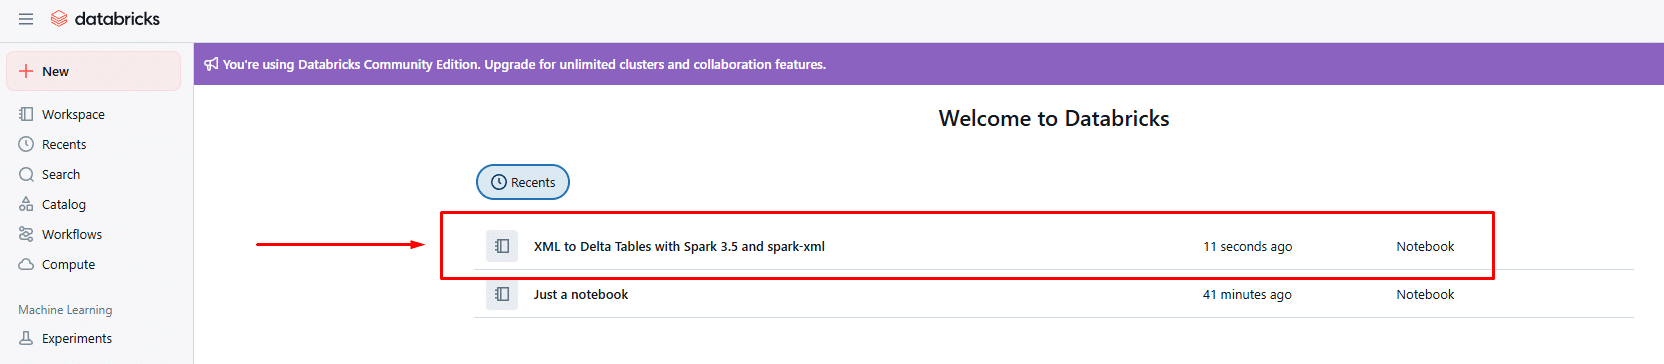
Once created, you’ll finally have a code environment to write your manual code. You may change the notebook name as I show below:

If the notebook is created successfully, it will also show up in your main dashboard:
Step 5: Read the XML File with (native) spark-xml
In this step, we’ll write our Python code to read and parse the source XML file in the Databricks notebook.
Start with some imports in the first cell:
|
1 |
from pyspark.sql.functions import col, explode |
Then, in the next cell, you should specify the file path to the location of the XML in DBFS (as it occurs in Step 3). Then read the XML file with the following code:
|
1 2 3 4 5 6 |
# Path to uploaded XML file input_path = "dbfs:/FileStore/tables/simple_XML_test_cases/simplexmltocsv_1.xml" df_company = spark.read.format("xml") \ .option("rowTag", "Company") \ .option("attributePrefix", "") \ .load(input_path) |
Note: spark-xml requires you to know your rowTag ahead of time; there’s no auto-detection or schema guessing. If the XML is complex or inconsistent, expect parsing errors or missing data.
As discussed earlier in the Databricks features section, it is important to consider what the extra parameters of the command mean for parsing the XML:
- rowTag is a required parameter that specifies the XML element that should be treated as one row in the resulting DataFrame.
- We use attributePrefix to simplify column names in the resulting DataFrame.
Step 6: Flatten the XML with the explode() command
Now comes the real work: manually navigating the XML structure layer by layer with explode().
In this step, you’ll need to use PySpark’s explode() command (as imported in Step 5) to navigate down the XML tree, unpacking arrays of child elements step by step so that they can end up with a clean table.
This process is called flattening the XML and has several limitations compared to normalisation, which is the state-of-the-art approach to XML conversion.
Before getting started with this step, you’ll need to know the structure of your source XML very well (the simple XML test case for this workflow).
Start with a basic selection to get company and department names:
|
1 2 3 4 5 |
df_departments = df_company.select( col("name").alias("company_name"), col("Department.name").alias("department_name"), col("Department.Team").alias("teams") # We'll explode this in the next few commands ) |
Then keep exploding each nested level. Here’s how the code looks for this manual approach:
|
1 2 3 4 5 6 7 8 9 10 11 12 13 14 15 16 17 18 19 20 |
df_teams = df_departments.select( "company_name", "department_name", explode("teams").alias("team") ) df_projects = df_teams.select( "company_name", "department_name", col("team.name").alias("team_name"), explode("team.Project").alias("project") ) df_tasks = df_projects.select( "company_name", "department_name", "team_name", col("project.name").alias("project_name"), explode("project.Task").alias("task") ) |
Each explode() gets you one level closer to a usable table.
It’s tedious, sure, but at least predictable (well, if you’re in a real-world XML conversion project, this process is OK until the source XML structure changes).
|
1 2 3 4 5 6 7 8 9 10 11 12 13 14 15 16 17 |
df_subtasks = df_tasks.select( "company_name", "department_name", "team_name", "project_name", col("task.name").alias("task_name"), explode("task.Subtask").alias("subtask") ) df_final = df_subtasks.select( "company_name", "department_name", "team_name", "project_name", "task_name", col("subtask.name").alias("subtask_name") ) |
By the end of Step 6, you’ll have a flattened table in df_final. All we need to do is write your df_final to a Delta table, as we do in Step 7 (I promise it is the last step).
Step 7: Save as Delta Table
To check your flattened table (i.e. dataframe), try the following Python statement in a cell of your notebook:
If you are happy with the result (despite the repeating/redundant values), then you may write to a Delta Table as follows:
|
1 2 3 |
df_final.write.format("delta") \ .mode("overwrite") \ .saveAsTable("company_full_subtasks") |
Now, to check your Delta Table in Databricks, navigate to the Catalog tab on the left, and check if your table appears. It should.
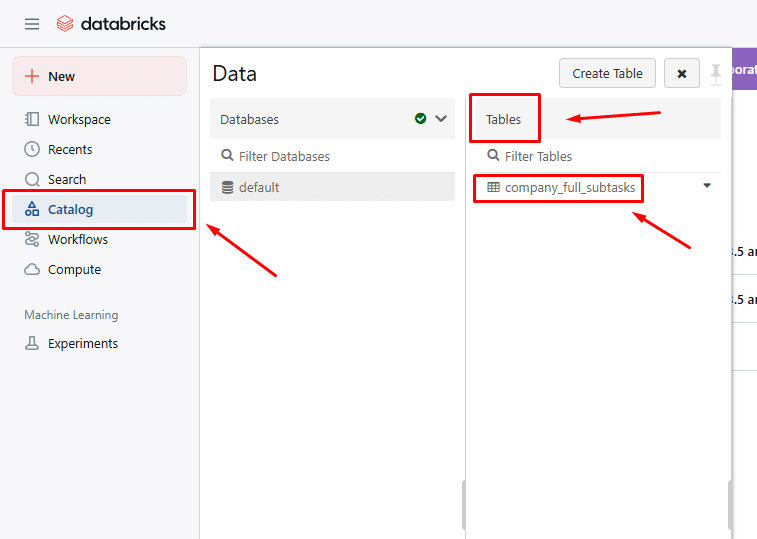
Double-click it, and you’ll be able to view it in your browser:
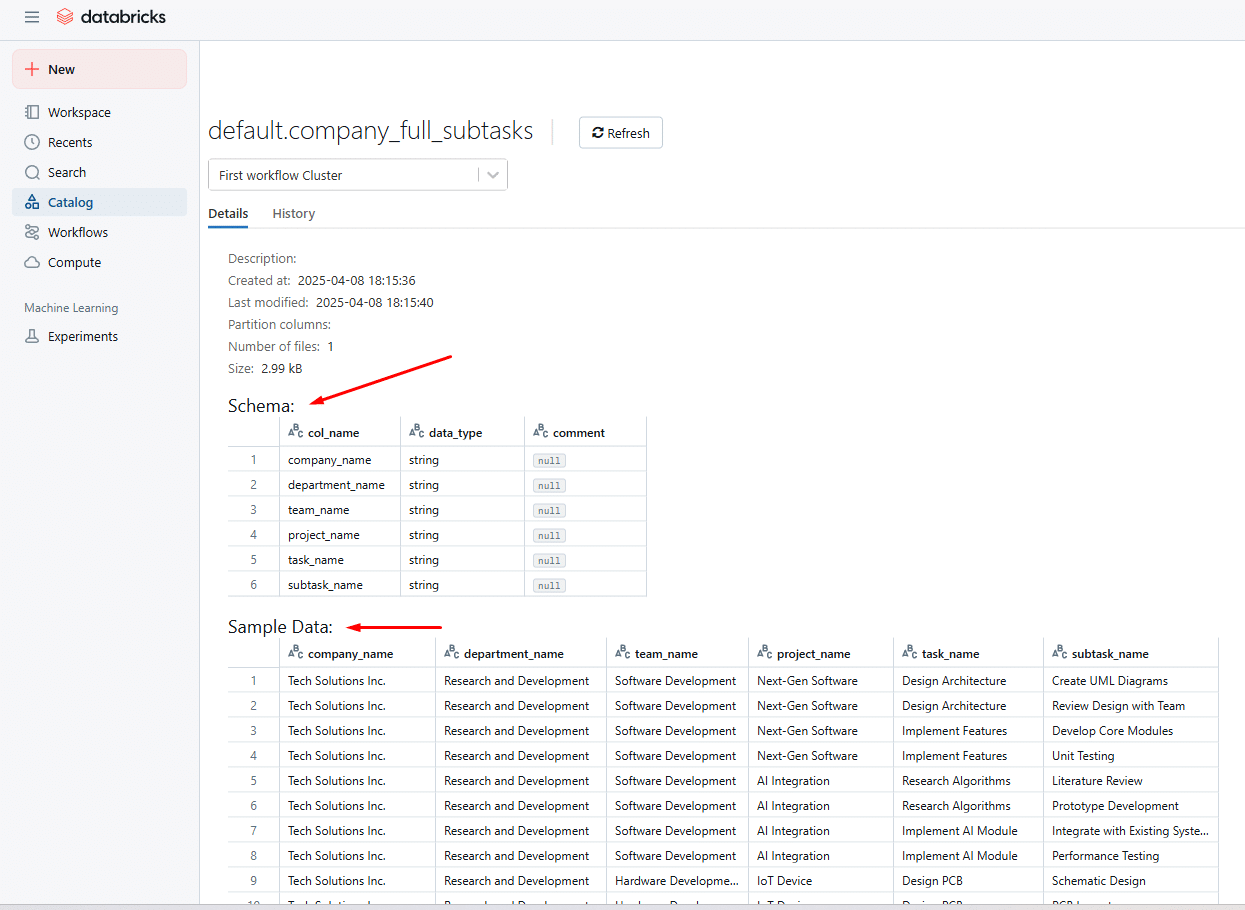
Congrats! Your source XML data is now converted into a Delta Table in Databricks.
But remember, if the XML changes, so does your manual code in Steps 5 and 6 (well, and every other step).
Pro tip
XML conversion projects aren’t your average data task; they’re a different beast entirely.
Even seasoned data engineers can hit roadblocks without the right success factors in place.
If you’re considering whether to tackle it in-house or outsource the conversion and free up your team for higher-impact work, you’re not alone. Here’s a helpful resource to guide that decision.
Verdict: Let’s be real: this process works, but it’s not elegant. When working with any real-world XML file (other than the simple XML test case I’ve used here), you’ll be basically hardcoding your way through an XML file using trial and error, and a lot of explode().
This approach gets the job done for simple, well-structured XML, but things will break down fast with deeply nested or inconsistent files.
Databricks offers a clean environment for testing small data flows, but it doesn’t solve the complexities of XML parsing. At best, this is a workaround, not a solution built for XML.
For anything more than a handful of static test files, you’ll want something more robust.
Limitations of converting XML on Spark and Databricks
I’ve shown you how to convert XML with Spark and Databricks, but here’s what I haven’t told you: the caveats.
During my testing, I uncovered some major limitations that could break your workflow when relying on spark-xml or newer tools like Databricks’ Auto Loader.
Below, I’ll walk you through the hidden pitfalls you need to know before going all-in.
Limitations of spark-xml-based approaches (Spark and Databricks)
Databricks 14.3 and Spark 4.0 now bundle spark-xml for out-of-the-box XML handling, but don’t let the “native” label fool you.
Under the hood, the same old issues persist: manual parsing, fragile schema support, and the same flatten-it-all approach that crumbles under real-world XML.
Here’s what my testing with more complex test cases revealed, and why you should think twice before relying on it in production.
- Manual coding is unavoidable
Spark-xml-based pipelines typically require heavy manual effort.
That means you have to write (and maintain) the code to parse XML elements and map values, handle exceptions, and stitch everything together.
This adds overhead and increases the risk of bugs, particularly for data teams without deep XML experience.
What Flexter does instead?
Flexter automates schema discovery and mapping so you’re not hand-writing (and re-writing) parsing/flattening logic every time the XML changes.
It’s configuration-driven and repeatable, which is exactly what manual pipelines aren’t.
- Flattening leads to One Big Table (OBT) syndrome
Regardless of the method used, Spark flattens the hierarchical XML structure into a single table. This results in repeated values and inefficient queries.
Normalisation, where hierarchical branches are broken into multiple related tables with proper primary and foreign keys, isn’t supported natively and must be implemented manually, if at all.
What Flexter does instead?
Instead of dumping everything into a single OBT, Flexter outputs normalised relational tables (with appropriate relationships), so queries stay sane, storage stays efficient, and you don’t live inside explode() forever.
- Poor XSD support
According to my testing, the spark-xml library struggles to properly interpret XSDs, especially when dealing with common features like namespace imports and polymorphism.
In both cases, parsing either failed entirely or produced incomplete schemas, resulting in broken dataframes and missing structure.
This lack of robust XSD support forces engineers to manually translate constraints into the target schema, adding time and complexity.
What Flexter does instead?
Flexter supports full XSD-driven parsing, including patterns that commonly break Spark pipelines (like polymorphism via xsi:type), and it uses the XSD to build the target model without you manually translating constraints into code.
- No built-in schema evolution
Handling changes in XML structure, such as updated cardinalities, new or missing XPaths, or datatype changes, requires manual intervention.
My testing showed that even enabling the latest Databricks 14.3+ features couldn’t handle schema shifts gracefully.
When elements changed type or structure, Databricks and Spark failed to append new data to existing tables, causing ingestion to break.
I had to intervene and rewrite the parsing and flattening logic manually.
This made my workflow very hard to maintain; I don’t even want to think about the long-term (e.g. what happens if my XML changes in two years from now).
What Flexter does instead?
Flexter detects schema changes and supports automated evolution with version tracking and upgrade scripts, so you’re not rebuilding the pipeline every time cardinalities, XPaths, or datatypes shift.
- Fragile schema inference
Although .option(“inferSchema”, “true”) exists, it’s unreliable across multiple files.
If just one XML file differs in structure, missing an element or changing its nesting, Spark may infer an inconsistent or incorrect schema.
This is a known issue that has been widely reported in community discussions.
What Flexter does instead?
Flexter’s runtime schema checks + logging reduce silent failures and make ingestion runs diagnosable and restartable.
One weird file shouldn’t be allowed to derail your SLA like it’s the main character.
And please take note: Fragile schema inference isn’t just “annoying”.
It’s operational risk: one weird file can skew schema inference, break ingestion, and blow up your SLAs.
Flexter’s runtime schema checks + logging reduce silent failures and make pipelines restartable.
- Handling edge cases becomes a hackathon
Without robust XML support, I had to fall back on custom string logic, regex, or brittle transformation chains to handle XML edge cases.
These solutions are hard to maintain and fail silently when unexpected structures appear.
What Flexter does instead?
Flexter is built to handle real-world XML edge cases without regex archaeology.
You get consistent parsing behaviour plus validation and error reporting, instead of a brittle chain of transformations that fails quietly.
- You still have to guess your way through schema design
Even once data is parsed, transforming it into a usable, scalable schema in Spark and Databricks remains challenging.
Nested structures, mixed content, and inconsistent XML fields turn schema design into a high-stakes guessing game, one that’s easy to get wrong and hard to maintain.
What Flexter does instead?
Flexter auto-generates an optimised target schema (not just “whatever fell out of flattening”), so you’re not gambling on a table design that becomes unmaintainable the moment the XML grows.
It can also generate an optimised target schema based on your XSD, accurately, and without the guesswork.
- Lack of automated documentation
There’s no out-of-the-box generation of Source-to-Target Mappings (STM), Entity-Relationship Diagrams (ERDs), or schema evolution tracking.
Based on my test cases, this gap creates documentation debt that becomes a huge long-term liability.
What Flexter does instead?
Flexter auto-generates ERDs, STM mappings, lineage, and version diffs, and stores them in a metadata catalogue for governance and change management.
Translation: you don’t pay interest on documentation debt forever.
- Integration & workflow reality check
In production, you typically need to:
- Trigger conversions on a schedule or event (CLI/API),
- Monitor runs (status, metrics, logs) and alert on failures,
- Orchestrate the whole thing (jobs, retries, backfills).
Manual Spark/Databricks notebook workflows don’t give you that end-to-end.
What Flexter does instead?
Flexter supports API/CLI-driven runs that are easy to plug into orchestrators (for example, Databricks Jobs or Airflow), with run status and logging so failures are visible and retries/backfills are practical.
Eyeing AWS EMR as a workaround for Databricks in your XML pipeline?
It might feel like a smart move: more control, lower cost. But don’t let advertisements mislead you.
EMR still drags the same baggage: manual parsing, limited XSD support, and brittle schema inference. And if Redshift is your destination? The cracks show fast.
I’ve tested these scenarios myself and broken them all down so that you don’t have to.
Check out my full XML to Redshift guide before you commit to another half-solution.
Understanding the Limitations of Databricks’ Auto Loader
If the Auto Loader feature in Databricks has “sparked” your interest (pun intended), you’re not alone.
This feature by Databricks promises simplified XML data ingestion from cloud storage into Delta Lake, with a few lines of manual code.
At this point, please note that Auto Loader is a unique feature of Databricks that supports XML ingestion, starting from Databricks 14.3 and onwards. It is not available in Spark.
Pro tip
If you’re doing this in production (multiple files, evolving XML, real SLAs), skip ahead to the automated option: Flexter.
Flexter is the difference between a pipeline and a permanent debugging hobby.
While this feature sounds convenient, I’ve attempted to test it and see if I can develop an XML conversion workflow that will help me with a simple XML test case.
Here’s the workflow I’ve tried in order to test Databricks’ Auto Loader:
Steps 1 and 2: Create a Databricks Community account and set up a Cluster
These are exactly the same as when I tested XML conversion with native support in Databricks.
Step 3: Upload the source XML file to DBFS
In step three, there’s a slight change as compared to previous testing; you’ll need to create a subfolder in DBFS (called “simple_XML test_cases” in my case) and then upload the simple XML test case there, as I show in Step 3 (here) of my previous workflow.
This is because Auto Loader won’t read single files, but will monitor folders of files.
Step 4: Create a Databricks Notebook
This is exactly the same as I show in my previous XML to Darabricks workflow (Step 4).
Step 5: Reading and Parsing XML
This is where things started to get complicated (exponentially).
In this step, I expected all the promises of Auto Loader to come to fruition on my monitor; only I was met with more (hidden) headaches.
The first hidden headache is that Auto Loader always needs an XSD specified when reading the XML.
Surprisingly, despite schema inference and schema evolution being claimed as the core Auto Loader features, I still had to consider providing an XSD.
But, in our simple XML test case, which is just one of the simpler potential test cases in the real world, I do not have XSD!
So what I had to do was use the spark-xml-based schema inference, as I did in my other workflows, and then provide the inferred schema to Auto Loader’s readStream command.
Here’s how the code looks for Step 5. First, define the imports and filepaths needed for this step:
|
1 2 3 4 5 6 |
from pyspark.sql.functions import col, explode # Path to the input XML file and a required schema location input_path_1 = "dbfs:/FileStore/tables/simple_XML_test_cases/" input_path_2 = "dbfs:/FileStore/tables/simple_XML_test_cases/simplexmltocsv_1.xml" schema_path = "dbfs:/FileStore/tables/simple_XML_schema/" # Required for schema inference |
And then use the spark-xml-based parsing and schema inference options:
|
1 2 3 4 5 6 |
df_schema = spark.read.format("xml") \ .option("rowTag", "Company") \ .option("attributePrefix", "") \ .load(input_path_2) schema = df_schema.schema |
And based on this derived schema, you may now read and parse the simplest of XML test cases as follows (well, actually, we’re setting up the readStream, which we will trigger later on):
|
1 2 3 4 5 6 7 8 9 10 11 |
# Read XML using Auto Loader and let it infer schema df_stream = spark.readStream \ .format("cloudFiles") \ .option("cloudFiles.format", "xml") \ .option("rowTag", "Company") \ .option("attributePrefix", "") \ .schema(schema) \ .load(input_path_1) # Preview schema (non-blocking) df_stream.printSchema() |
Now with readStream in place, we have a streaming DataFrame that continuously monitors input_path_1 for new XML files, parses each <Company> element into a structured initial table, using the provided schema.
Unfortunately, after Step 5, you still don’t get a final flattened table to write to Delta Lake.
You must still follow Step 6, as we did in our XML to Databricks workflow.
Curious why Auto Loader insists on having a schema up front?
It’s not just a quirk; Databricks explicitly explains this in their documentation, and you can read more about it here.
Step 6: Yes, you need to flatten the XML (again)
Auto Loader won’t help normalise your XML into an efficient target schema. It also won’t help you flatten it into One Big Table (OBT).
In this step, you will have to write manual code to flatten the XML, exactly as we did in Step 6 of the XML to Databricks workflow.
So you may head over there and see the manual code needed for this step. The only thing you may need to change is “df_company” to “df_stream” in the first explode statement.
Step 7: Write the flattened XML to a Delta Table with a streaming service
You’d think that after jumping through all these hoops, you could at least wrap things up by streaming your XML straight into a Delta table.
Well, think again. Auto Loader throws in one last twist: it won’t let you stream directly into an SQL-registered Delta table.
Instead, you first have to write the streaming data to a Delta path using .start(output_path), and only then can you register it as a table with .saveAsTable() or a good old-fashioned CREATE TABLE statement.
Because why make the last step easy?
Here’s how the code for this last step looks:
|
1 2 3 4 5 6 7 8 9 10 11 12 13 14 15 16 17 18 |
from datetime import datetime # Generate unique timestamp-based paths and table name timestamp = datetime.now().strftime("%Y%m%d_%H%M%S") output_path = f"/dbfs/FileStore/tables/output/simple_XML_{timestamp}" checkpoint_path = f"/dbfs/FileStore/tables/checkpoints/simple_XML_{timestamp}" # Start streaming flattened data to Delta query = ( df_final.writeStream .format("delta") .outputMode("append") .option("checkpointLocation", checkpoint_path) .trigger(once=True) # Run one micro-batch and stop .start(output_path) ) query.awaitTermination() |
In the code I’m showing you above, I’ve triggered the streaming service once to read, parse and flatten my XML test case.
At this point, you’re writing the flattened XML data to a Delta table path in append mode using structured streaming, with a checkpoint for fault tolerance and a unique timestamp to organise the output.
However, this is usually not what we mean when converting to a Delta table because the data is simply written to a path and not registered as a table in the metastore.
Without registration, you can’t query it like a normal SQL table or manage it through the Databricks UI. That final step still needs to be done manually.
To write your flattened XML to a Delta Table, you need one more step:
|
1 2 3 4 |
spark.read.format("delta").load(output_path) \ .write.format("delta") \ .mode("overwrite") \ .saveAsTable("company_full_subtasks") |
At long last, after all that manual effort, your XML data is finally written to a Delta Table in Databricks (you should see the same result as in my XML to Delta with Databricks workflow).
Time to relax? Well, maybe not.
Because any change in your source XML’s structure means you’ll need to revisit and adapt Step 5 all over again.
So, What’s the Catch with Auto Loader?
Let’s be honest: while Databricks Auto Loader sounds like it should do all the heavy lifting for you, when it comes to converting XML to Delta Tables… it mostly just watches you do the work.
Here’s the reality: Auto Loader inherits all the manual flattening pain from the classic Databricks 14.3, Spark and spark-xml-based approaches.
Yes, you’re still responsible for converting that deeply nested XML into a flat, analytics-friendly One Big Table (OBT). No magic wand here.
But wait, Auto Loader doesn’t just stop at not helping. It adds a few quirks of its own:
Schema inference? Not really: Auto Loader takes a step back from spark-xml since it can’t reliably infer nested XML structure. I had to use spark.read in batch mode to figure out the schema, then hand it over to the stream.
No direct save to SQL tables: You can’t just stream your results into a SQL-friendly Delta table with .saveAsTable(). Instead, you stream to a raw Delta path and then register it manually, like a bureaucratic form you forgot to fill out.
Lazy execution strikes again: Transformations like explode() don’t run until the stream starts writing. That means your code looks fine… until it doesn’t, and you find out only after triggering the Spark job.
And who knows what chaos might ensue if you over-explode your XML outside the safe sandbox of Databricks Community Edition.
If it melts a few cores in the process, please don’t send me the invoice.
How to free up your team with an automated XML to Databricks and Spark solution
If you’ve followed the blog post up to here and tried to replicate my workflows, you’ve:
- Written custom code to flatten nested XML structures.
- Dealt with fragile schema inference and manual XML flattening workarounds.
- Probably rebuilt parts of your pipeline every time your XML changed or tried a different XML file.
- Watched Databricks’ “native support” fall short in real-world scenarios.
- And if you wanted to keep some documentation, you had to create your own Source-to-Target mappings from scratch.
And that’s just to convert your simple test cases, most likely with up to three levels of nesting.
Now imagine scaling this to a real-world project with hundreds of XML files, frequent schema changes, and tight deadlines.
The problem?
Except for the case when you can hire a team of XML Conversion Experts, manual XML to Delta (or Parquet) workflows don’t scale.
They’re time-consuming, error-prone, and depend too heavily on custom logic that breaks easily.
The Alternative: Automated XML to Delta Conversion
If only a dedicated, purpose-built XML to Databricks solution existed, right?
What if I told you that it exists, it’s called Flexter, and you are just a few clicks away from converting your XML to Delta in Databricks?
Ready to Scale Your XML Conversion Workflow?
Flexter Enterprise is the leading automated XML to Databricks conversion platform, and it outshines all other alternatives because:
- Automation (it requires zero code): just download Flexter, configure your Databricks connection, and point it to your XML files or folders.
- Scalability: It scales effortlessly and converts XML of any size or volume, and adjusts performance based on your infrastructure.
- Versatility: It fits any environment: use it via CLI or API, or deploy it on-prem or in the cloud. It supports your team’s tech stack: compatible with multiple OS environments and various data sources (FTP, SFTP, HTTPs, object storage, queues).
- It will take your XSD as input and automatically build a relational target schema in Databricks or Spark without requiring you to manually add any constraints.
- It handles your XML’s complexity with ease: Supports deeply nested XML, multi-file XSDs, and industry-standard formats.
- Normalised Schemas: Your data will not be flattened in One Big Table (OBT), but it will get normalised into multiple connected tables for efficient storage and retrieval.
- Optimisation Algorithms: It optimises your target schema using state-of-the-art algorithms that convert unnecessary hierarchies into simpler one-to-one relationships to improve query performance.
- Metadata Management: It delivers full documentation out of the box, including ER diagrams, Source-to-Target mappings, schema diffs, and a metadata catalogue.
- It supports your team’s tech stack: Compatible with multiple OS environments and various data sources (FTP, SFTP, HTTPs, object storage, queues).
- Reliability: It includes built-in monitoring and validation tools, enabling you to track errors and performance with confidence.
- If you become familiar with it, you can convert it to other file formats or databases, such as CSV, TSV, Snowflake, Mysql, ORC, Avro, etc.
- It’s backed by expert support: From setup to troubleshooting, Flexter’s team is ready to assist via email, phone, or support tickets.
If my list hasn’t convinced you yet, you can also try Flexter Online for free to convert your real-world XML files with just a drag and drop through your browser:
Convinced and don’t want to waste another minute? See Flexter in action!
Book a call with Flexter Enterprise and find out how it can transform your XML to Delta workflow, at scale.