Automatically converting ESMA MIFID II / MIFIR XML to Snowflake
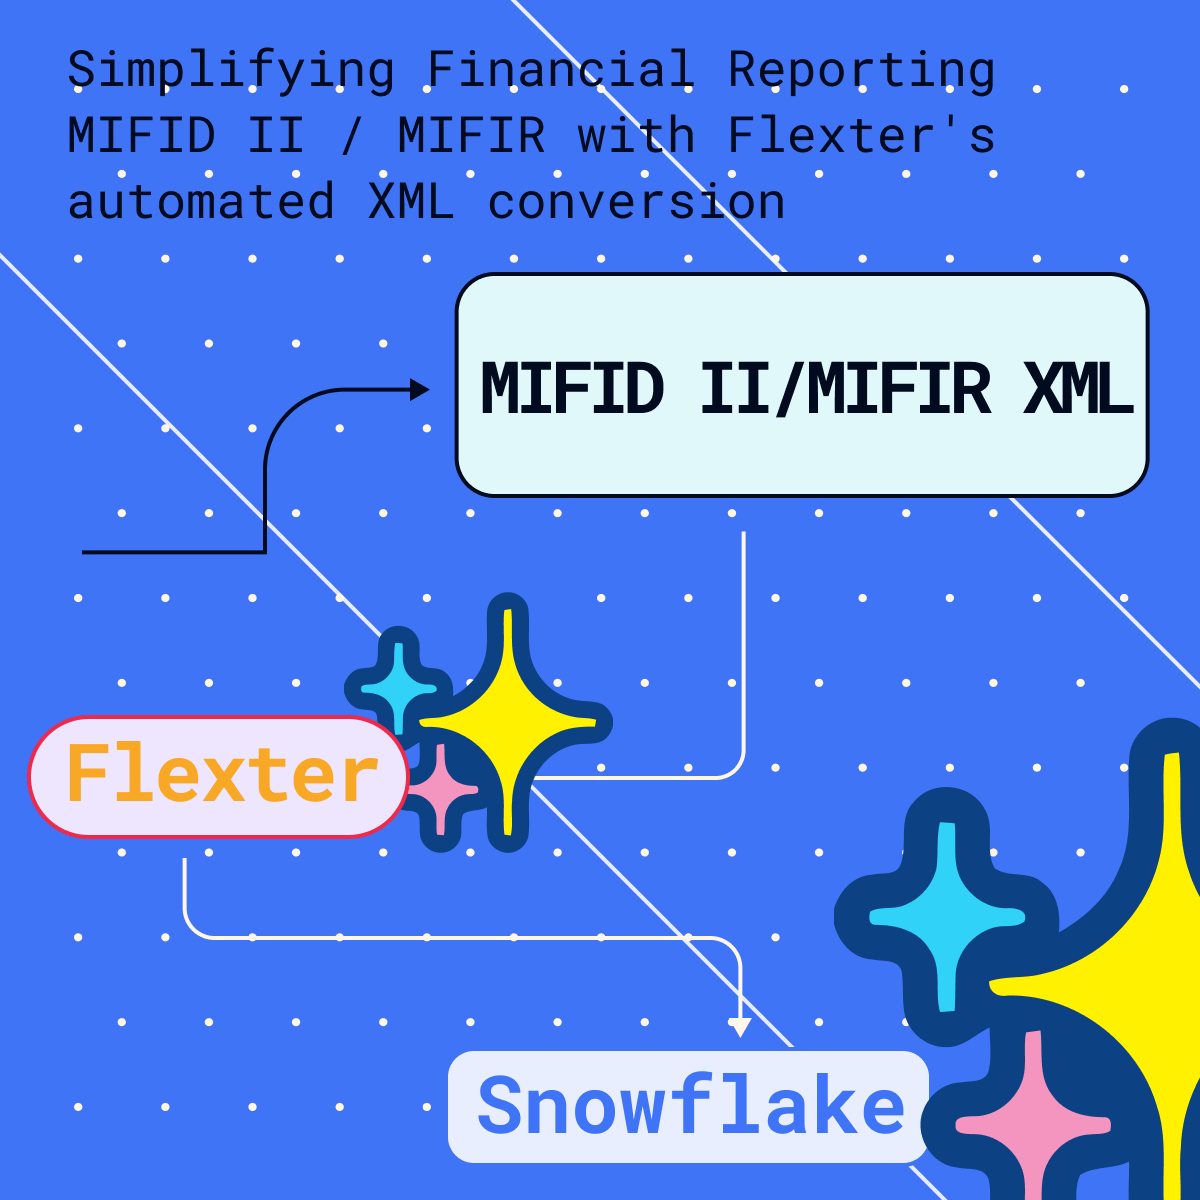
Use Flexter to turn XML and JSON into Valuable Insights
- 100% Automation
- 0% Coding
What is ESMA?
ESMA is an independent European Union authority that was established in 2011 to enhance the protection of investors and ensure the orderly functioning of financial markets in the European Union.
ESMA has a wide range of powers, including:
- Setting regulatory standards for financial markets
- Monitoring the compliance of financial market participants with regulations
- Taking enforcement action against those who breach regulations
- Cooperating with other European and international authorities
Some of the key tasks of ESMA:
- Setting technical standards: ESMA sets technical standards for financial markets, such as the standards for transaction reporting and market abuse. These standards help to ensure that financial markets are operated in a consistent and orderly manner.
- Monitoring compliance: ESMA monitors the compliance of financial market participants with regulations. This includes monitoring the activities of investment firms, credit rating agencies, and other financial institutions.
- Enforcement: ESMA can take enforcement action against those who breach regulations. This includes issuing fines, suspending licenses, and banning individuals from working in the financial industry.
- International cooperation: ESMA cooperates with other European and international authorities, such as the European Central Bank and the International Organization of Securities Commissions (IOSCO). This cooperation helps to ensure that financial markets are regulated in a consistent manner across borders.
What is ESMA XML?
ESMA XML stands for European Securities and Markets Authority eXtensible Markup Language. Financial information is reported to regulators like ESMA using this standardised data format. Data can be represented in a hierarchical manner using the adaptable XML format, which makes it simpler to comprehend and interpret.
ESMA XML is a collection of standards and XSDs that are used for different purposes. The specific standards and XSDs that are used will depend on the type of data being reported. ESMA XML is used to report a wide range of financial data, including:
- Financial statements
- Transaction data
- Market data
- Risk data
- Compliance data
The European Union’s efforts to improve the efficiency and transparency of financial reporting heavily rely on ESMA XML.
Here are a few advantages of utilising ESMA XML:
- ESMA XML makes it simpler for regulators to obtain and evaluate financial information, increasing openness. This can aid in risk identification and fraud prevention.
- Efficiency gain: ESMA XML can aid in automating the reporting of financial data. The two can be saved in this way.
- Error reduction: ESMA XML is a structured format that can aid in reducing reporting errors.
- Enhanced adaptability: ESMA XML is a format that may be customised to fit the requirements of various jurisdictions.
In practice this works in a way where financial institutions that are required to report to ESMA, submit their XML that must comply with the relevant ESMA Schema. ESMA then verifies the XML and publishes it on their website.
In the case of smaller banks, depending on a couple of factors like size of the bank, location, specific requirements of central banks etc. they would submit their reports to central banks which will then submit to ESMA.
The European Securities and Markets Authority (ESMA) has established several XSD schemas to standardize the reporting and transparency requirements across the European Union for various financial instruments and entities. These schemas serve as the foundation for regulatory data submissions to ensure consistency and interoperability across member states. Here is a list of some of the notable ESMA XSD schemas:
- MiFID II/MiFIR:
- Reporting of financial instrument reference data.
- Transaction reporting.
- Order record keeping.
- Commodity derivatives position reports.
- Data reporting services providers (DRSPs).
- EMIR (European Market Infrastructure Regulation):
- Derivative transaction reports.
- Central counterparty (CCP) related reports.
- SFTR (Securities Financing Transactions Regulation):
- Reporting of securities financing transactions.
- Collateral reuse reporting.
- Investment fund reports.
- AIFMD (Alternative Investment Fund Managers Directive):
- Reporting by Alternative Investment Fund Managers (AIFMs).
- Annex IV reporting.
- CSDR (Central Securities Depositories Regulation):
- Reporting by Central Securities Depositories (CSDs) and other entities.
- Prospectus Regulation:
- Reporting related to the storage of regulated information (OAM).
Probably ESMA’s most important and most widely used XML standard is MiFID II/MiFIR. We will cover it in more detail in the next sections of this blog post.
What is MiFID II/MiFIR?
MiFID II/MiFIR stands for Markets in Financial Instruments Directive/Markets in Financial Instruments Regulation. It is a set of regulations that was adopted by the European Union in 2014 to improve the transparency and integrity of the European financial markets. MiFID II/MiFIR applies to a wide range of financial instruments and investment firms, and it covers a variety of topics, including:
- Transaction reporting: MiFID II/MiFIR requires investment firms to report all of their transactions in financial instruments to a central database. This helps to improve transparency and prevent market abuse.
- Order record keeping: MiFID II/MiFIR requires investment firms to keep records of all of their orders, including the price, quantity, and time of the order. This helps to ensure that investors are treated fairly and that there is no market manipulation.
- Position reporting: MiFID II/MiFIR requires investment firms to report their positions in certain financial instruments, such as derivatives. This helps to ensure that the markets are not unduly influenced by any one participant.
- Investor protection: MiFID II/MiFIR introduces a number of measures to protect investors, such as requiring investment firms to provide clear information about the risks involved in investing.
MiFID II and MiFIR are two separate pieces of legislation, but they are often referred to together. The main difference between MiFID II and MiFIR is that MiFID II is a directive, while MiFIR is a regulation. This means that MiFID II is a more general framework, while MiFIR is more detailed and binding.
Here is a table summarising the key differences between MiFID II and MiFIR:
| Feature | MiFID II | MiFIR |
|---|---|---|
| Type of legislation | Directive | Regulation |
| Scope | Applies to all financial instruments and investment firms | Applies to certain financial instruments and investment firms |
| Topics covered | Transparency, market integrity, investor protection | Transaction reporting, order record keeping, position reporting |
| Binding nature | Not binding, but must be implemented by EU member states | Binding |
Converting MiFID II/MiFIR XML to Snowflake
XML is supposed to be readable by humans. This may be the case for simple XML documents but it is not true for complex XML documents and for scenarios where you need to run analytics or create reports on top of XML.
If you want to query the data that is locked away in XML you will need to convert it to a database. In this section of the blog post we will show you how you can automate the conversion process of MiFID II/MiFIR XML to Snowflake.
Let’s first dive into some of the challenges you will face when trying to convert XML to a relational format in a database.
What is hard about converting XML to a database?
Converting XML can be a hard and long process. Especially when you are trying to build your own solution. Let’s go through a list of reasons why converting can be hard:
- Manpower – finding developers with XML knowledge can be difficult. Not a lot of developers would be interested in learning skills that are very niche (XSLT or XQuery), and where incentives for learning those skills are missing.
- Industry Standard – some industry standards can be complex with hundreds or thousands of entities. Understanding and mapping the standards can require a lot of time.
- Increased Risk – With building your solutions, you increase a risk of failing the project. We have seen 50% of these projects fail. The other 50% run over budget.
- Timelines – XML conversion tasks can often run longer than planned. The complex nature of XML can result in unexpected delays, making it hard to predict completion times accurately.
- XML updates – unexpected changes to the XML can bust the entire project by increasing the time and cost of it
- Performance – Standard data integration tools tend to be slow and still require a lof of manual work
- Development life cycle – Development of conversion tool can take weeks to months to do
- Breaking budget – XML conversion projects tend to be really costly, because of all of the above. About 50% of the projects fail and the other half run over budget.
Despite these challenges, if you are still interested in building your own tool, there are a number of tools and techniques that can be used to do this. On our website we wrote about 6 factors that can make your XML conversion project successful, where we are talking about the importance of assembling the right expertise, ensuring performance, scalability, optimising outputs, preemptively addressing refactoring, and generating accurate documentation.
Automatically converting MiFID II/MiFIR XML to Snowflake
Flexter
Because of all these issues, we have created Flexter. It takes care of the pain points of converting XML, and fully automates the process without any need to do any coding on your side. Just install it and run the conversion. With Flexter you reduce the need for developers with super niche knowledge, as well as reducing the number of developers needed and freeing their time to focus on actual data. It also reduces the amount of risk of not completing the project and reduces the amount of time needed to finish the project from weeks and months to hours and days.
With Flexter, converting MiFID XML to Snowflake is a fully automated process, without manual coding. You can do it in a couple of simple steps.
- Create a Data Flow. When you create a Data Flow, Flexter creates a logical target schema and the mappings between the XML elements in the Source XML and the table columns in the Snowflake relational target schema.
- Pick up the XML documents from a source. Process and convert the XML to Snowflake tables.
The figure below summarises the two steps
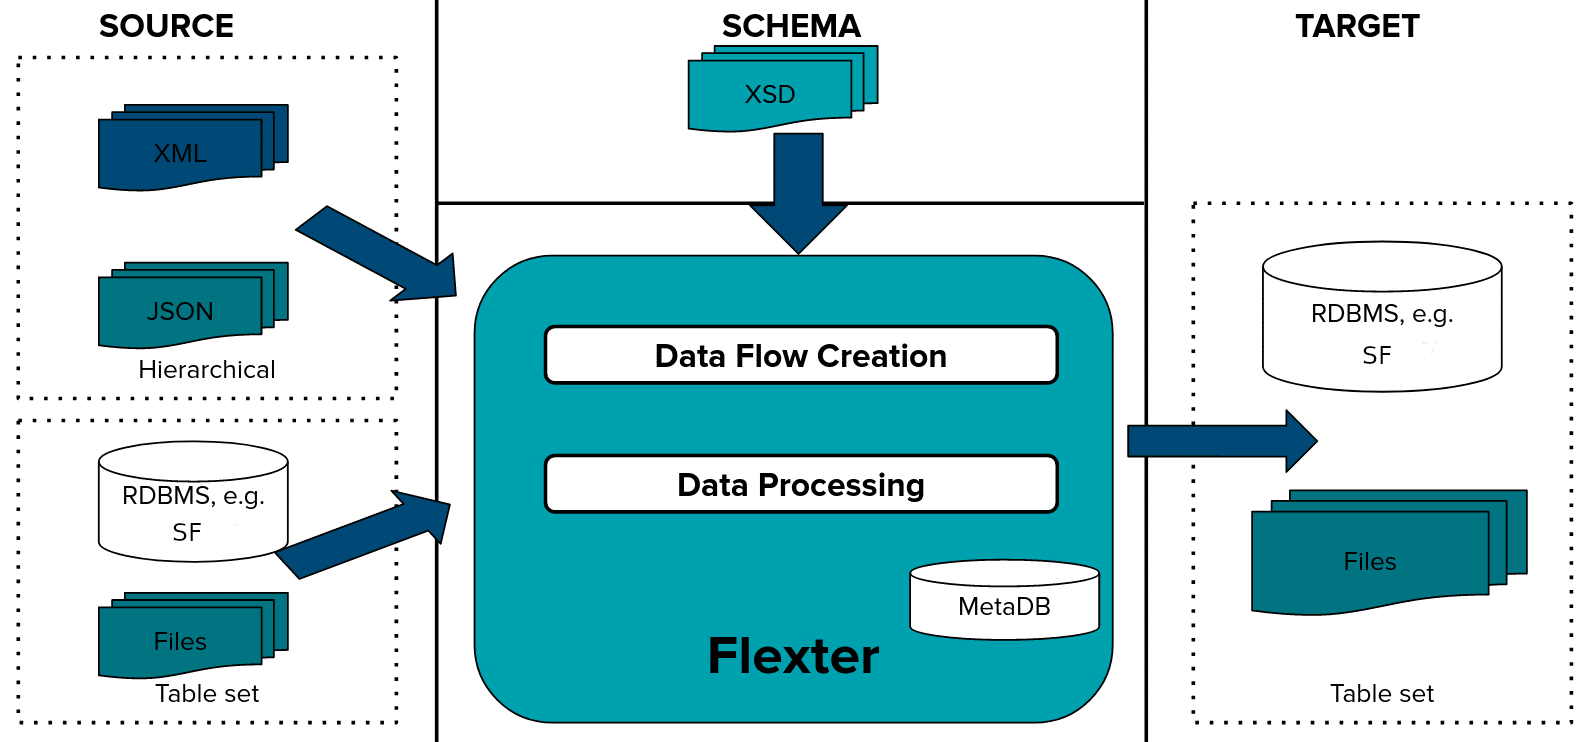
We will now show you both of these steps in detail.
Data Flow creation
First we generate a Data Flow using the MiFID XSD. A Flexter Data Flow is a logical target schema that maps the elements from the XML/XSD documents to table columns. Both are stored in Flexter’s metadata catalogue.
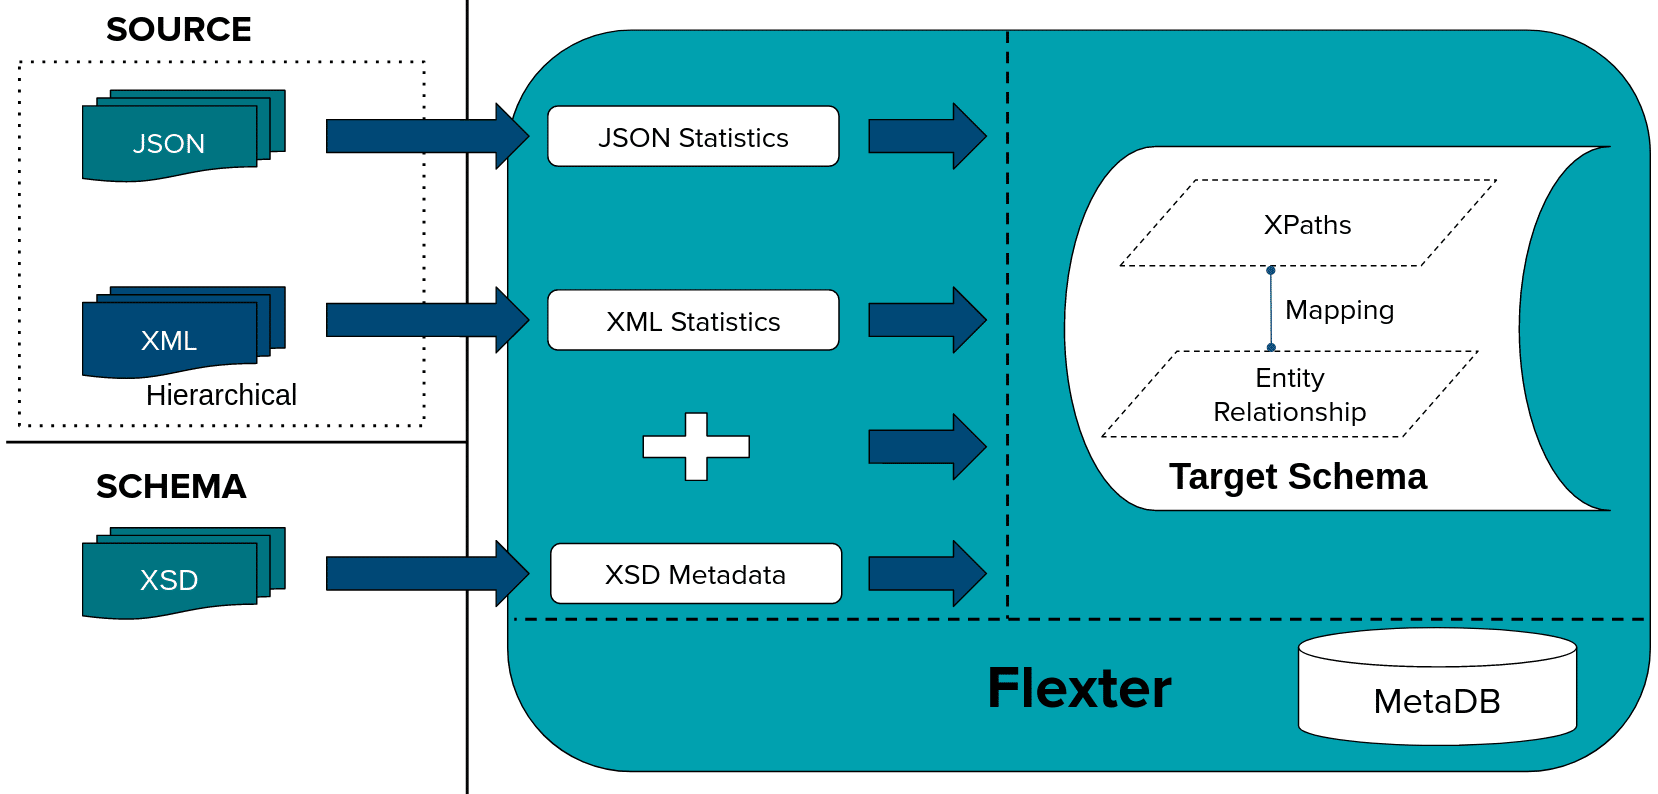
Flexter can generate a target schema from an XSD, a sample of XML files or a combination of the two.
We issue the following command to Flexter with the location of our XSD. We will showcase different levels of optimisations that Flexter can apply on Target Schema and simplify it. Flexter not only automates your XML conversion but it ships with AI algorithms to optimise the output. Optimisation is an algorithm that can be applied to the target schema to simplify the output and reduce the number of tables in your target schema. Flexter ships with two different optimisation algorithms that simplify the target schema, elevate and re-use.
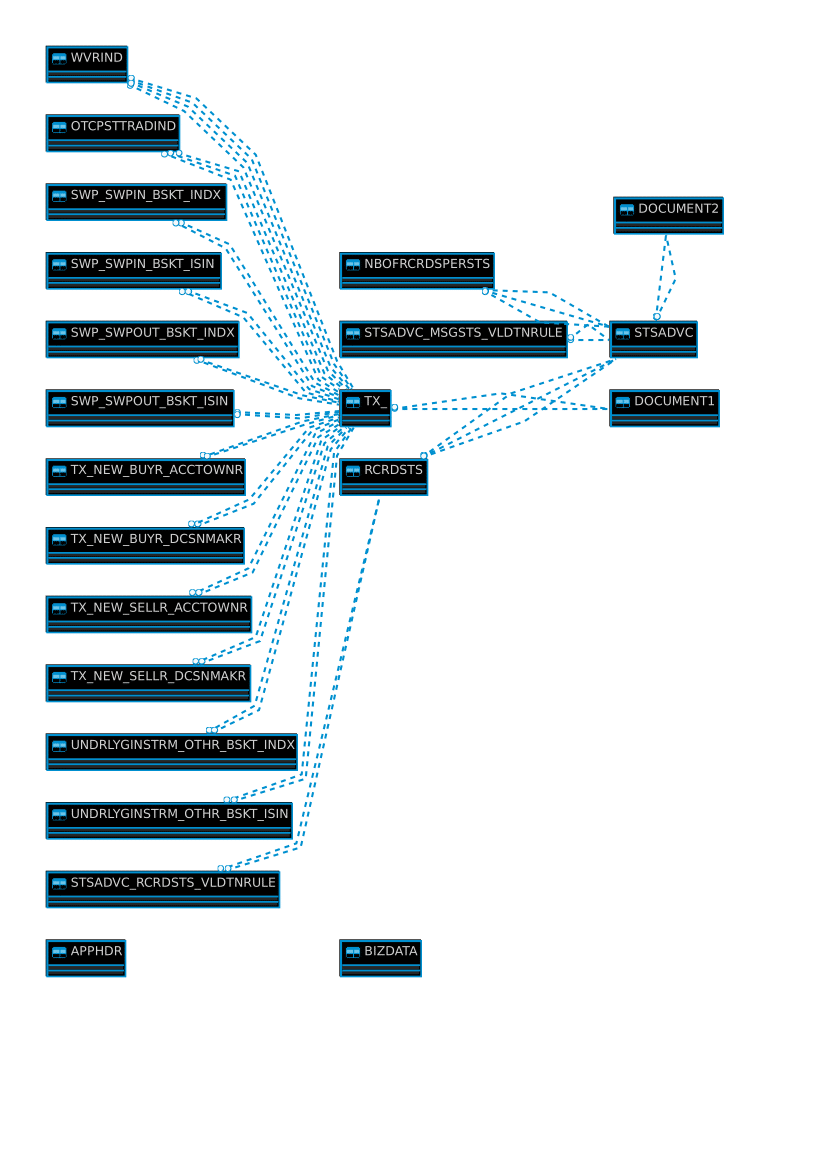
First we will convert the target schema with the elevate optimisation. The Elevate Optimisation detects 1:1 relationships in the XML hierarchy that have been modelled as 1:N relations. It is Flexter’s default optimization mode.
|
1 |
xsd2er -g1 /esma/midif_xsd.zip |
Output:
|
1 2 3 4 5 6 7 8 9 10 11 12 13 14 15 16 |
20:00:35.986 INFO Building metadata 20:00:36.064 INFO Writing metadata 20:00:36.120 INFO Generating the mapping: elevate,reuse 20:00:36.210 INFO Registering success of job 3 20:00:36.225 INFO Finished successfully in 1058 milliseconds # schema origin: 3 logical: 1 job: 3 # statistics load: 447 ms parse: 365 ms build: 83 ms write: 56 ms map: 92 ms xpaths: 16 |
Data Conversion
We have create the Data Flow and can now convert MiFID XML documents to a relational format.
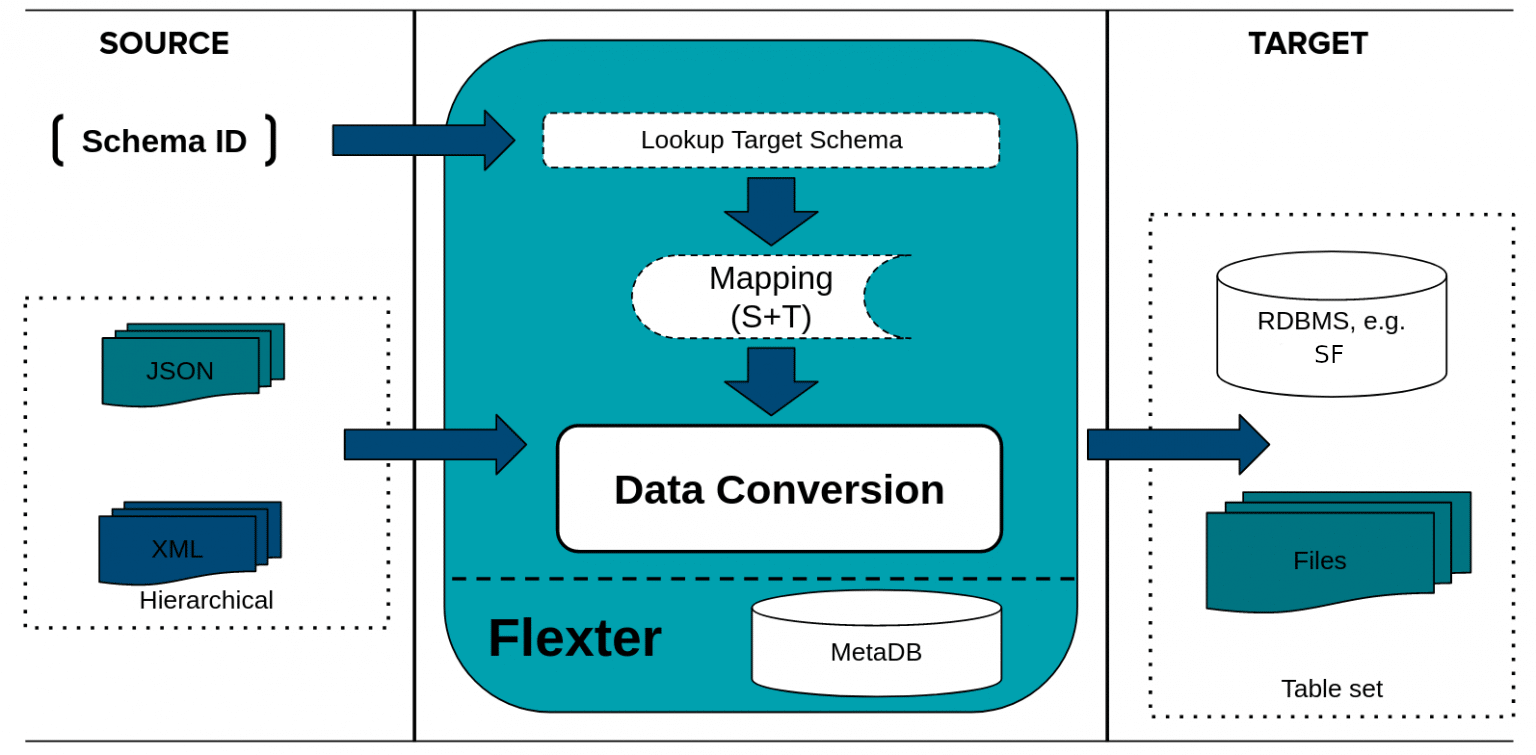
We pass in the schema_id from the Data Flow we created in the previous step, the connection details to Snowflake, and the path to the XSD documents we want to convert
|
1 |
xml2er -x3 -S w -u esma_user -p “esma_pwd” jdbc:snowflake://dsauh831Zhdsa.snowflakecomputing.com?db=emsa&schema=esma |
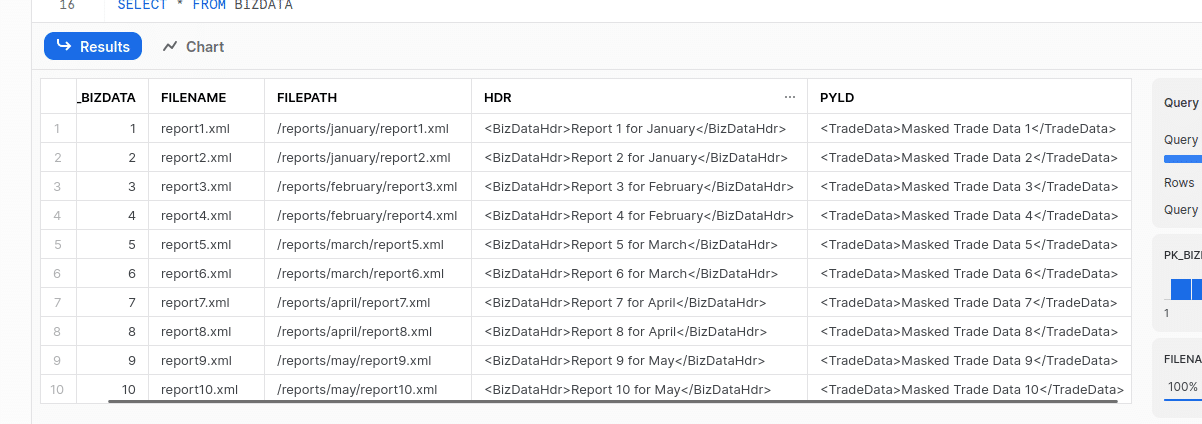
By running a query under, we can see all the tables that were created by conversion.
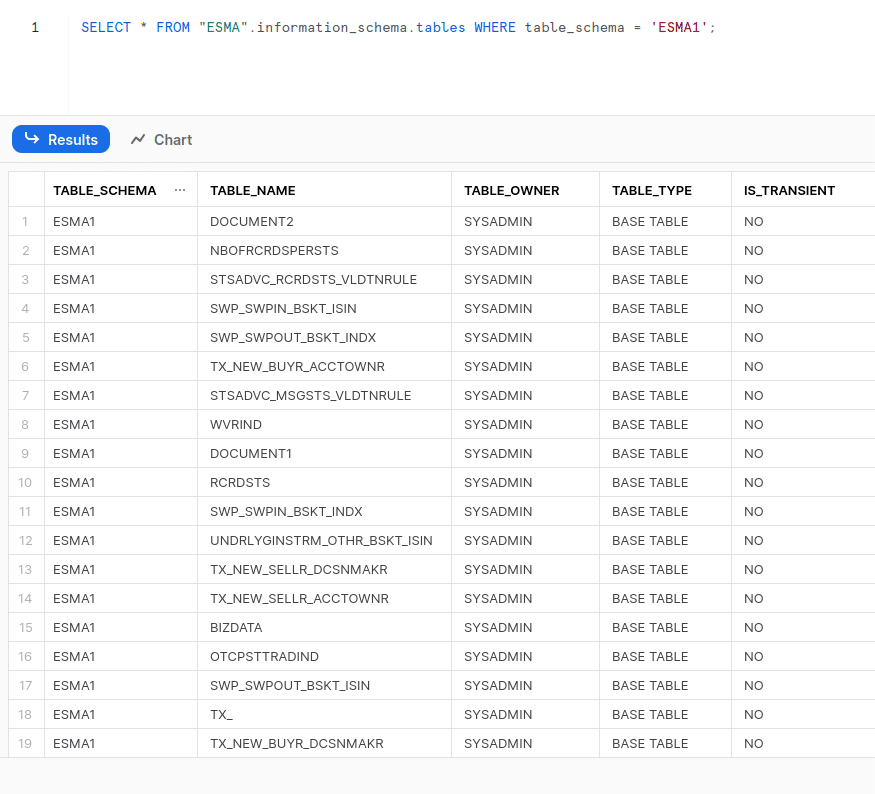
The target schema has been created and populated.
We can query the data
We can also check the ER Diagram. Flexter comes with a web UI to download DDL, an ER diagram and a source to target map to map XML source elements to target table attributes.
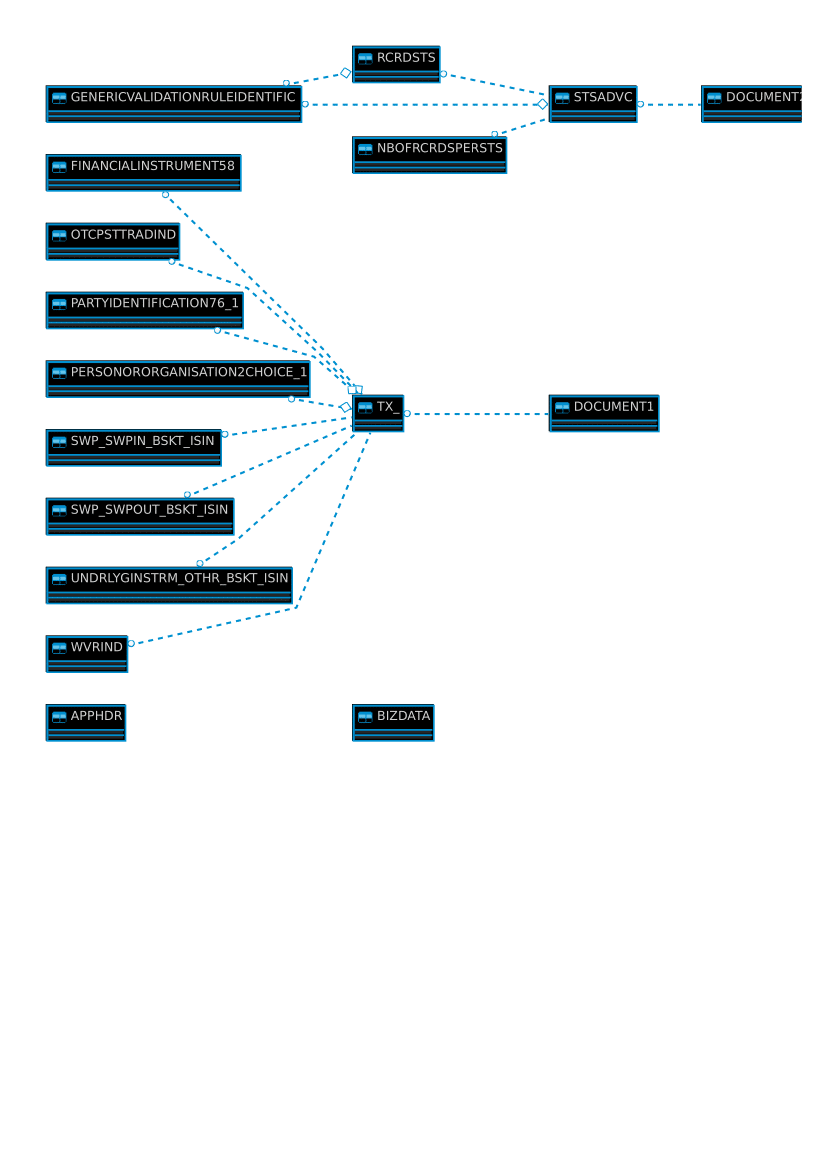
We can also use reuse optimization. In an XML Schema (XSD) a type can be instantiated multiple times under different names. Flexter detects this behaviour and consolidates the information of different type instances in the same relational entity.
To run this we will change from “-g1” to “-g3” when we create a data flow. This will create an even simpler target data model.
Lastly let’s see how the schema looks when we don’t use any optimization. To run conversion without any optimisation instead of “-g1” we will use “-g0”. Since the ER Diagram is too big, a link to it can be found here.
Conclusion
Using Flexter to convert any XML, especially complex XML such as the various ESMA XML schema is very easy. We have shown you how quickly and easily Flexter can convert XML to a readable format (Snowflake). With the usage of Flexter you can make your life a lot easier and focus on what is really important, and that is actual data and analysing it.
If you are interested in Flexter, book a demo.
In this video, we use Flexter to automatically convert very complex FpML XML to Snowflake tables. Book a demo to see the power of Flexter in action!


